Set up a Zoom connector
Perform the following steps to set up your Zoom connector.
-
Log in to Zenoss Cloud as a user with the Manager role, and then open the ADMIN > Connectors page.
-
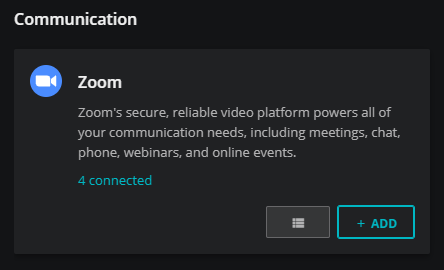
On the Zoom card in the Communication section, click ADD.
-
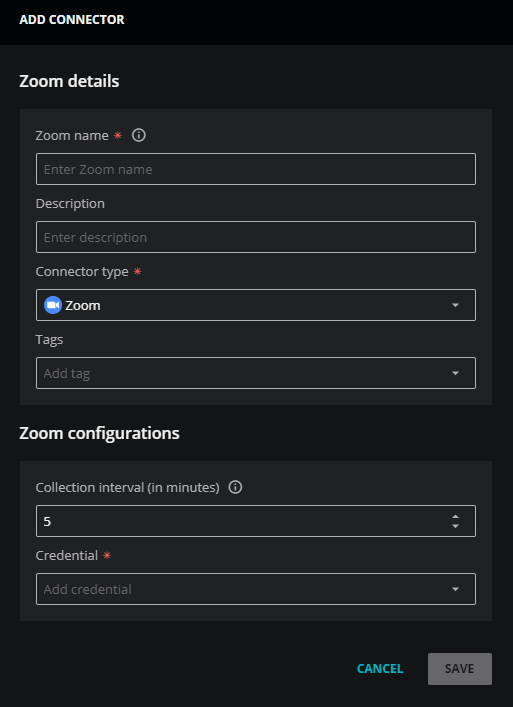
In the Zoom details section, add general information about your application.
-
In the Zoom Name field, enter a unique name for your application connector.
The name you choose is used as the source name for the data Zenoss Cloud collects.
-
(Optional) In the Description field, enter text to associate with your Zoom connector.
-
Leave the Connector type field unchanged.
-
(Optional) In the Tags field, enter one or more terms to associate with your Zoom connector.
-
-
In the Zoom configurations section, set an optional collection interval, then select an existing credential or create a new one.
-
Set the Collection interval. The default setting is 5 minutes.
-
From the Credential list, select an existing credential or create a new one. When you choose Create new credential, the dialog box expands to include fields for creating a new credential for Zoom.
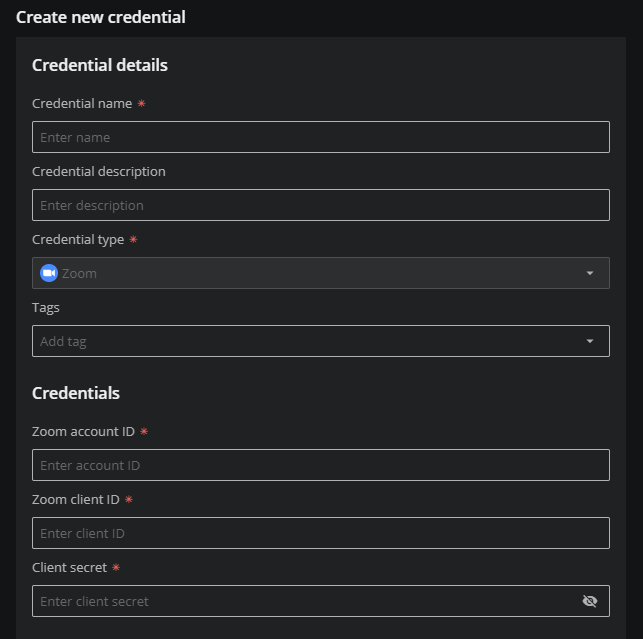
For more information about creating a new credential, see Add Zoom credentials.
-
-
Click SAVE.
To view the metrics Zenoss Cloud collects, copy a template or create a new dashboard.