Add an anomaly trigger
Use this procedure to create a new anomaly trigger. You must have the Manager role to create a trigger.
-
Open the ADMIN > Actions page, and then click the TRIGGERS tab.
-
In the upper-right corner, click ADD TRIGGER.

-
The ADD TRIGGER dialog box opens.
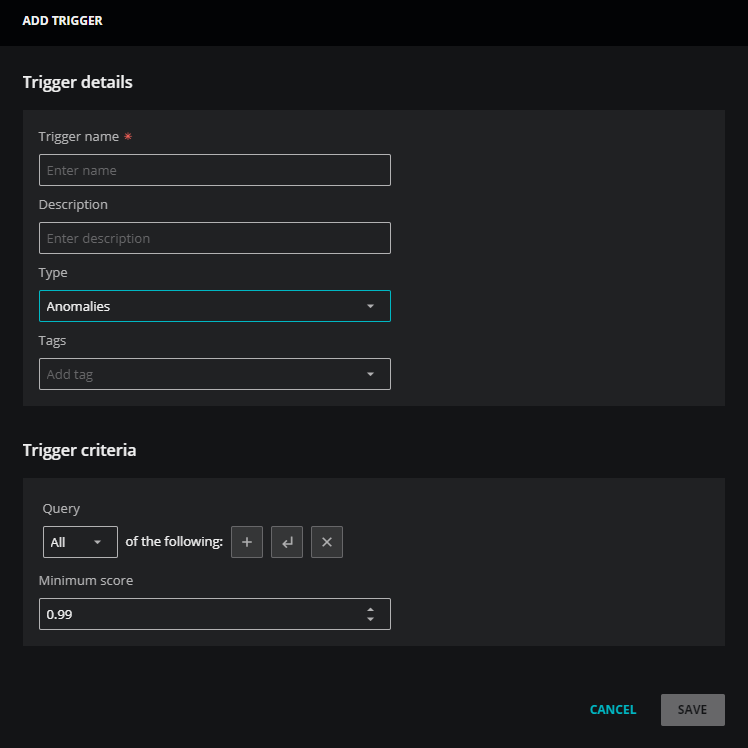
In the Trigger details section, enter the following information:
-
In the Trigger name field, enter a name.
Note that trigger names can't be changed after the ADD TRIGGER dialog box is saved.
-
(Optional) In the Description field, enter text to describe the trigger.
-
From the Type list, choose Anomalies.
The ADD TRIGGER dialog box expands to include new fields.
-
(Optional) In the Tags field, add one or more terms to associate with the trigger.
-
-
In the Trigger criteria area, create a query to specify a metric and, optionally, to identify one or more entities in your environment.
-
In the first comparison, select the Metric name field for the left side, the equal to operator, and the name of the metric that is being modeled for the right side.
The anomaly detection service only trains models of a metric when it finds enough historical data for the metric. To determine whether a metric is being modeled, open the Smart View page of an entity for which the metric is collected and look for confidence bands in graphs of the metric.
-
(Optional) Add comparisons to identify entities in your environment.
For more information, see Trigger queries and Anomaly trigger fields.
Best Practice
As a best practice, use
Entity: Production State equal to Productionas a trigger criteria. This criteria can prevent matches that are "false positives" against non-production entities.For example, include this criteria to avoid matching against devices that might be in Maintenance.
To match on additional production states, consider using the
greater thanorgreater than or equal tooperators. -
-
In the Minimum score field, enter a threshold value for anomaly scores. When an anomaly score exceeds this value, the trigger matches.
Typically, values lower than 0.99 yield irrelevant matches, so Virtana recommends starting with 0.99. Then, raise the value to (for example) 0.995 to improve matches, if necessary.
-
Click SAVE.