Devices and device attributes
Clearing heartbeat events
If you have devices configured to send a recurring event that is mapped to a heartbeat class, you can clear stale heartbeat events.
To perform this procedure, you need ZenManager privileges.
To clear the heartbeat events associated with a device:
- In Collection Zone, navigate to ADVANCED > Settings.
- In the left panel, select EVENTS.
- At the bottom of the Event Configuration page, click the Clear button in the Clear Event Heartbeats section. The system displays a brief message banner.
Renaming a device
Because the system uses the manage IP to monitor a device, the device name may be different than its fully-qualified domain name (FQDN). The device name must always be unique in the system. To rename a device:
- Navigate to the device in the device list. Click the device name.
- On the device overview page, edit the Device Name field with the new device name.
- Click Save. The system renames the device and displays a confirmation message of the action.
Re-identifying a device
Changing the device ID in the system is different from changing the device name. If you change the ID, you must associate existing performance data with the new device ID; otherwise, you lose the data for this device. However, the re-association process takes time, and during processing, metrics are not collected or graphed for this device.
You have the option of deleting existing performance data and starting fresh with the new device ID. Collection of new performance data begins immediately.
- Navigate to the device in the device list and click the device name.
- At the bottom of the device overview page, click the Action menu and choose Reidentify Device.
- In the Reidentify Device dialog box, enter a new ID for the device.
- Choose whether to re-associate existing performance data for the device or delete it.
- Click SUBMIT. On successful completion of the job, collection resumes automatically and no further action is required.
- Only if the job fails, manually resume data
collection for the device as follows:
- Log in to Collection Zone as a user with ZenManager privileges.
- At the bottom of the device overview page, click the Action menu and choose Resume Collection.
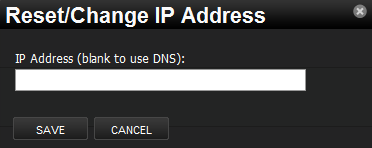
Resetting the device manage IP address
You might reset the manage IP address if the IP address of a device changed and you want to maintain the historical data at the original IP address. To reset the manage IP address of a device:
-
Navigate to the device in the device list.
-
At the bottom of the device overview page, select Reset/Change IP Address from the Action menu.
-
Enter the new IP address for the device, or leave the field blank to allow the IP address to be set by DNS.
-
Click Save. The IP address for the device is reset.
Updating device configuration
When a configuration change would alter how a device is modeled or monitored, the relevant collector services are automatically informed. If the change does not appear to have taken effect, you can start the update process manually.
Follow these steps:
- Navigate to INFRASTRUCTURE > Devices, and then select the device to update.
- At the bottom of the device overview page, select Push Changes from the Action menu. Collector services retrieve updated device configuration information and use it for future monitoring and modeling.
Remodeling a device
Remodeling forces the system to re-collect all configuration information associated with a device. Normally, the system models devices every 720 minutes; however, if you want to remodel a device immediately, follow these steps:
- Navigate to the device in the device list and click on the Device name.
- At the bottom of the Device Overview page, click the Model Device button. The system remodels the device. A dialog box appears that shows progress of the action.
Deleting a device
Follow these steps to delete a device:
- Navigate to the INFRASTRUCTURE page.
-
Select the device you want to remove from the system by clicking on its row. You can select multiple devices by Ctrl-clicking or Shift-clicking the devices. Be sure to click on the row in an area that is not defined by a link.

-
Optional: Change the selection to close current events for the device. By default, event data is removed.
-
Click Submit.
The system removes the devices and associated data (if selected), and displays a confirmation message of the action.
Locking device configuration
You can lock a device's configuration to prevent changes from being overwritten when remodeling the device. Two levels of locking are available. You can lock the configuration from deletion and updates, or solely from deletion.
Note
Device locking prevents changes and deletion due to remodeling, but does not prevent manual changes and deletion.
To edit lock selections for a device configuration:
-
Navigate to the device in the device list.
-
At the bottom of the device overview page, select Locking from the Action menu. The Lock Device dialog box appears.
- Select the type of lock you want to implement or remove.
- To send events when actions are blocked by a lock action, select the "Send an event..." option. The lock or unlock action is implemented on the device, and the system displays a confirmation message of the action.