Virtana Service Observability agent on Kubernetes
The Virtana Service Observability agent on Kubernetes collects key cluster metrics from kube-apiserver and then streams them directly to Virtana Service Observability. The agent sends both metric and model data for pods, containers, nodes, namespaces, and the cluster itself.
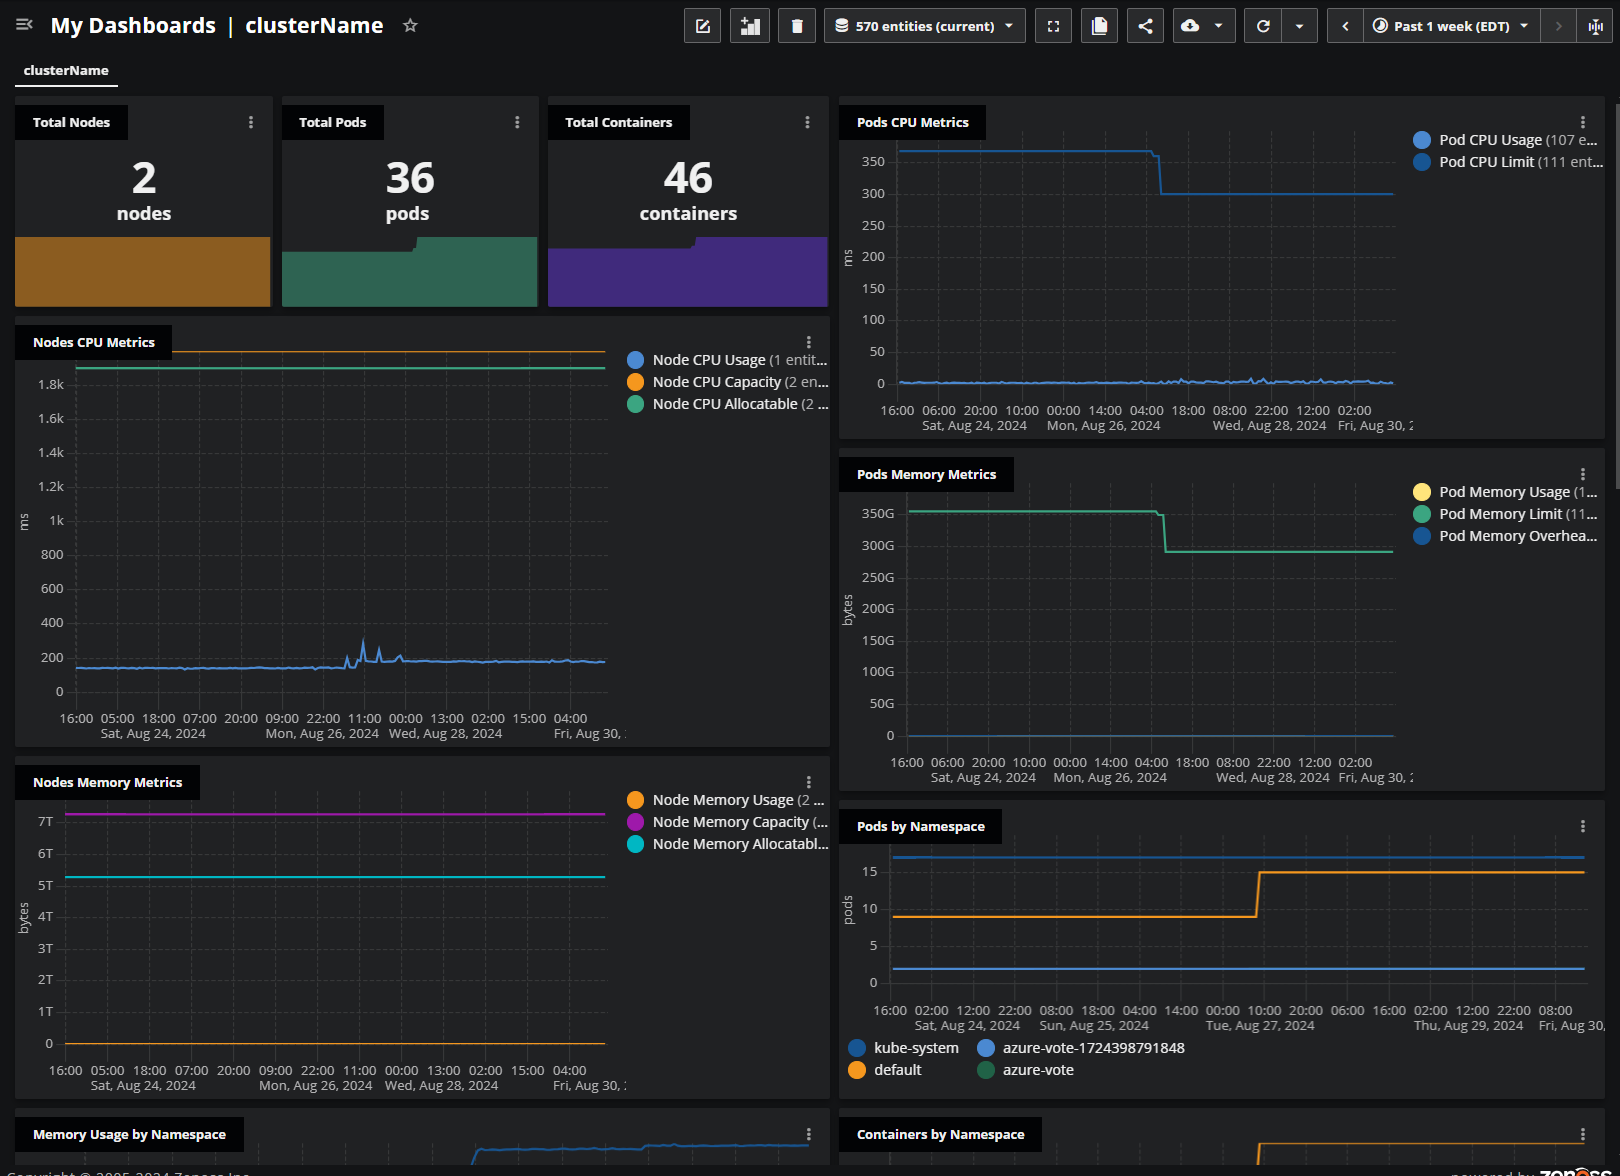
You can view the metric data in dashboards or in Smart View. After installing the agent, you can customize the provided Kubernetes dashboard template for your purposes.
The Virtana Service Observability agent on Kubernetes requires a metrics-server. You install the agent in a cluster and Kubernetes schedules the agent in its own pod on one node. Your cluster size determines how much RAM the agent consumes.
The agent uses incremental change notifications to collect data, so it receives updates any time a monitored property changes. The agent sends a batch of metric data to Virtana Service Observability every 60 seconds and sends a batch of model data when the model data changes.
Kubernetes model data
Virtana Service Observability uses the data collected by the Virtana Service Observability agent on Kubernetes to create separate entities for each unique node, pod, container, and namespace in a cluster, and one entity for the cluster itself. To find a cluster in a dashboard scope query or Smart View query, enter the cluster name that you specified when you deployed the agent.
Modeled entities include:
- k8s.cluster
- k8s.container
- k8s.deployment
- k8s.initcontainer
- k8s.namespace
- k8s.node
- k8s.pod
- k8s.service
- k8s.statefulset
Entity relationships
The model data that the Virtana Service Observability agent on Kubernetes sends to Virtana Service Observability includes entity relationships. The following diagram illustrates the relationships:

The arrows show which objects affect other objects. The relationships are used to populate the related entities area in Smart View.
The following list replicates the diagram in text:
- Nodes affect pods and the cluster.
- The cluster affects namespaces.
- Namespaces and containers affect pods.
Kubernetes metric data
You can configure many of the metrics that Virtana Service Observability collects for Kubernetes as tiles in Dashboards. All metrics are the gauge metric type.
Cluster metrics
| Metric | Units | Description |
|---|---|---|
| k8s.cluster.allocatable.cpu.ms | millisecond | Sum of all the allocatable CPU for the nodes in the Kubernetes cluster. |
| k8s.cluster.allocatable.memory.bytes | byte | Sum of all the allocatable memory for the nodes in the Kubernetes cluster. |
| k8s.cluster.capacity.cpu.ms | millisecond | Sum of all the capacity CPU for the nodes in the kubernetes cluster. |
| k8s.cluster.capacity.memory.bytes | byte | Sum of all the capacity memory for the nodes in the kubernetes cluster. |
| k8s.cluster.containers.total | integer | Total number of containers in the Kubernetes cluster. |
| k8s.cluster.cpu.ms | millisecond | Total CPU milliseconds used by all containers in the Kubernetes cluster. |
| k8s.cluster.limits.cpu.ms | millisecond | Sum of all the container CPU limits in the kubernetes cluster. |
| k8s.cluster.limits.memory.bytes | byte | Sum of all the container memory limits in the kubernetes cluster. |
| k8s.cluster.memory.bytes | byte | Total memory bytes used by all containers in the Kubernetes cluster. |
| k8s.cluster.nodes.total | integer | Total number of nodes in the Kubernetes cluster. |
| k8s.cluster.pods.total | integer | Total number of pods in the Kubernetes cluster. |
| k8s.cluster.requests.cpu.ms | millisecond | Sum of all the container CPU requests in the kubernetes cluster. |
| k8s.cluster.requests.memory.bytes | byte | Sum of all the container memory requests in the kubernetes cluster. |
| k8s.cluster.unhandledevents.total.sincestart | integer | Total number of unhandled events. |
Node metrics
| Metric | Units | Description |
|---|---|---|
| k8s.node.allocatable.cpu.ms | millisecond | Allocatable CPU for the kubernetes node. |
| k8s.node.allocatable.memory.bytes | byte | Allocatable memory for the kubernetes node. |
| k8s.node.capacity.cpu.ms | millisecond | CPU Capacity for the kubernetes node. |
| k8s.node.capacity.memory.bytes | byte | Memory Capacity for the kubernetes node. |
| k8s.node.cpu.ms | millisecond | CPU milliseconds used by the Kubernetes node. |
| k8s.node.memory.bytes | byte | Memory bytes used by the Kubernetes node. |
| k8s.node.cpu.ms | millisecond | CPU milliseconds used by the Kubernetes node. |
| k8s.node.memory.bytes | byte | Memory bytes used by the Kubernetes node. |
Namespace metrics
| Metric | Units | Description |
|---|---|---|
| k8s.namespace.containers.total | integer | Total number of containers in the Kubernetes namespace. |
| k8s.namespace.cpu.ms | millisecond | Total CPU milliseconds used by all containers in the Kubernetes namespace. |
| k8s.namespace.memory.bytes | byte | Total memory bytes used by all containers in the Kubernetes namespace. |
| k8s.namespace.pods.total | integer | Total number of pods in the Kubernetes namespace. |
Deployment metrics
| Metric | Units | Description |
|---|---|---|
| k8s.deployment.generation.observed | generation | Most recent generation observed for the Kubernetes deployment. |
| k8s.deployment.generation | generation | Current generation for the Kubernetes deployment. |
| k8s.deployment.replicas.available | integer | Number of available replicated pods for the Kubernetes deployment. |
| k8s.deployment.replicas.desired | integer | Number of desired replicated pods for the Kubernetes deployment. |
| k8s.deployment.replicas.ready | integer | Number of ready replicated pods for the Kubernetes deployment. |
| k8s.deployment.replicas.rollingupdate.max.surge | integer | Maximum number of replicated pods that can be scheduled above the desired number during a rolling update of the Kubernetes deployment. |
| k8s.deployment.replicas.rollingupdate.max.unavailable | integer | Maximum number of unavailable replicated pods during a rolling update of the Kubernetes deployment. |
| k8s.deployment.replicas.unavailable | integer | Number of unavailable replicated pods for the Kubernetes deployment. |
| k8s.deployment.replicas.updated | integer | Number of updated replicated pods for the Kubernetes deployment. |
| k8s.deployment.replicas | integer | Number of replicated pods for the Kubernetes deployment. |
Pod metrics
| Metric | Units | Description |
|---|---|---|
| k8s.pod.containers.total | integer | Total number of containers in the Kubernetes pod. |
| k8s.pod.cpu.ms | millisecond | Total CPU milliseconds used by all containers in the Kubernetes pod. |
| k8s.pod.limits.cpu.ms | millisecond | CPU limit for the Kubernetes pod. |
| k8s.pod.limits.memory.bytes | byte | Memory limit for the Kubernetes pod. |
| k8s.pod.memory.bytes | byte | Total memory bytes used by all containers in the Kubernetes pod. |
| k8s.pod.overhead.cpu.cores | core | Pod overhead with respect to CPU cores associated with running a pod. |
| k8s.pod.overhead.memory.bytes | byte | Pod overhead with respect to memory associated with running a pod. |
| k8s.pod.requests.cpu.ms | millisecond | CPU requested for the Kubernetes pod. |
| k8s.pod.requests.memory.bytes | byte | Memory requested for the Kubernetes pod. |
Statefulset metrics
| Metric | Units | Description |
|---|---|---|
| k8s.statefulset.collisions | integer | Number of hash collisions from the Kubernetes statefulset. |
| k8s.statefulset.generation.observed | generation | Most recent generation observed for the Kubernetes statefulset. |
| k8s.statefulset.generation | generation | Current generation for the Kubernetes statefulset. |
| k8s.statefulset.replicas.available | integer | Number of available replicated pods for the Kubernetes statefulset. |
| k8s.statefulset.replicas.current | integer | Number of replicated pods for the current revision of Kubernetes statefulset. |
| k8s.statefulset.replicas.ready | integer | Number of ready replicated pods for the Kubernetes statefulset. |
| k8s.statefulset.replicas.updated | integer | Number of updated replicated pods for the Kubernetes statefulset. |
| k8s.statefulset.replicas | integer | Number of replicated pods for the Kubernetes statefulset. |
Container metrics
| Metric | Units | Description |
|---|---|---|
| k8s.container.cpu.ms | millisecond | CPU milliseconds used by the Kubernetes container. |
| k8s.container.limits.cpu.ms | millisecond | CPU limit for the Kubernetes container. |
| k8s.container.limits.memory.bytes | byte | Memory limit for the Kubernetes container. |
| k8s.container.memory.bytes | byte | Memory bytes used by the Kubernetes container. |
| k8s.container.requests.cpu.ms | millisecond | CPU requested for the Kubernetes container. |
| k8s.container.requests.memory.bytes | byte | Memory requested for the Kubernetes container. |
| k8s.container.status.restarts.total | integer | Number of restarts for the Kubernetes container. |
Initcontainer metrics
| Metric | Units | Description |
|---|---|---|
| k8s.initcontainer.limits.cpu.ms | millisecond | CPU limit for Kubernetes init container. |
| k8s.initcontainer.limits.memory.bytes | byte | Memory limit for Kubernetes init container. |
| k8s.initcontainer.requests.cpu.ms | millisecond | CPU requested for Kubernetes init container. |
| k8s.initcontainer.requests.memory.bytes | byte | Memory requested for Kubernetes init container. |
| k8s.initcontainer.status.restarts.total | integer | Number of restarts for the Kubernetes init container. |
Installing the Virtana Service Observability agent on Kubernetes
To connect a Kubernetes cluster to Virtana Service Observability, you can install an agent in your cluster. The agent uses a YAML file for configuration settings.
You can install the Virtana Service Observability agent on Kubernetes by either using a Helm chart or directly using the kubectl command. In general, Virtana recommends using the Helm package manager to install the agent. More advanced users might choose the kubectl CLI.
Before installing the agent, you need:
-
The name of the Kubernetes cluster that you want to connect to.
-
A Virtana Service Observability API key for authentication
-
The correct Virtana Service Observability API endpoint for your environment.
The Virtana Service Observability agent on Kubernetes supports Kubernetes version 1.8 and higher. It requires the metrics-server.
Install the agent using Helm
Perform the following steps to install the Virtana Service Observability agent on Kubernetes using Helm. As a best practice, be sure to make the customizations as specified in Step 3 before installing the agent.
Before installing the agent, you need:
-
A Virtana Service Observability API key
-
Helm 3 or a higher stable release.
-
Carefully consider the
zenoss.clusterNamebefore installation. Your selectedzenoss.clusterNameis used as the source in Virtana Service Observability. As a best practice, use the name of the cluster in which this agent is being installed.- If you didn't use the actual name of the cluster, then specify it using the
zenoss.actualClusterNameparameter. If you have already installed the agent, you can run the Helm update command to set it.
- If you didn't use the actual name of the cluster, then specify it using the
Important
You must have an internet connection from the target cluster to Docker Hub so you can download the agent image.
-
Add the Virtana Service Observability chart repository to Helm. This repository contains the Helm chart for the Virtana Service Observability agent on Kubernetes. Run the following command:
helm repo add zenoss https://zenoss.github.io/charts/ -
Optional: Review the chart parameters that you can specify during installation.
-
Install the agent. In the following command, make the following customizations:
-
Replace
MY_RELEASE_NAMEwith a unique name for this installation of the agent. -
Replace
MY_CLUSTER_NAMEwith the unique name of the target cluster. -
If the cluster name is different, replace
MY_ACTUAL_CLUSTER_NAMEwith the correct cluster name in which the agent is being installed. If you are using Service Observability in the Virtana Platform, the actual name of the Kubernetes cluster is necessary. -
Replace
MY_API_KEYwith your Virtana Service Observability API key. -
Replace
MY_API_ENDPOINTwith the correct Virtana Service Observability API endpoint for your environment.
helm install MY_RELEASE_NAME zenoss/zenoss-agent-kubernetes \
  --set zenoss.clusterName=MY_CLUSTER_NAME \
  --set zenoss.actualClusterName=MY_ACTUAL_CLUSTER_NAME \
  --set zenoss.address=MY_API_ENDPOINT:443 \
  --set zenoss.apiKey=MY_API_KEY ; \

  history -d $(history 1)
Note
The
history -dcommand removes the authentication key from your shell history file. -
After installing the agent, create a dashboard using the Kubernetes template. In Dashboards, copy the Kubernetes dashboard template, then rename it, adjust the scope, and change the source to the name of the cluster that you chose when installing the agent.
For more information, see copy a template or create a new dashboard.
Important
If you are using Virtana Service Observability (Zenoss) with Virtana Platform, be sure to complete the tasks for deploying Container Observability (CO South) using Helm. To learn more, see Deploy CO South.
Manage the agent using Helm
To view the agent logs, run the following command:
kubectl logs -f deployment/MY_RELEASE_NAME-zenoss-agent-kubernetes
To view the current settings or edit them, run the following command:
helm get values -a MY_RELEASE_NAME
helm upgrade MY_RELEASE_NAME zenoss/zenoss-agent-kubernetes --reuse-values --set key=value
For example, you might want to turn on full debug logging. To do so, your command might look like the following:
helm upgrade MY_RELEASE_NAME zenoss/zenoss-agent-kubernetes --reuse-values --set zenoss.logUpdates=true --set zenoss.agent.logLevel=debug
Note
Allow a minute for the change to activate.
To upgrade an existing installation of the agent without changing its configuration, run the following command:
helm upgrade --reuse-values MY_RELEASE_NAME zenoss/zenoss-agent-kubernetes
Remove the agent using Helm
If you installed the agent using Helm, then you can also uninstall with Helm.
To remove an installation (release) of the agent, run the following command:
helm uninstall MY_RELEASE_NAME
For more information about using Helm, see Helm documentation.
Install the agent using kubectl commands
Kubernetes provides a CLI for communicating with a Kubernetes cluster using the Kubernetes API. If you choose this method to install the agent, it is assumed that you are familiar with the kubectl CLI.
Carefully consider the MY_CLUSTER_NAME before installation. Your selected MY_CLUSTER_NAME is used as the source in Virtana Service Observability.
Perform the following steps to install and manage the Virtana Service Observability agent on
Kubernetes using the kubectl command.
Important
You must have an internet connection from the target cluster to Docker Hub so you can download the agent image.
-
Set a cluster context. Configure
kubectlto use the correct Kubernetes cluster. In your terminal, run the following command:kubectl config current-context -
Store your authentication key as a Kubernetes secret. Create a secret for the Virtana Service Observability API key you are using for the target cluster.
In the following command, replace
MY_API_KEYwith your Virtana Service Observability API key:kubectl -n kube-system create secret generic zenoss \ --from-literal=api-key=MY_API_KEY ; history -d $(history 1)Note
The
history -dcommand removes the authentication key from your shell history file. -
Create a configuration file for the agent. For configuration settings, the agent uses a YAML file. In the following YAML file, make the following changes:
-
Replace
MY_CLUSTER_NAMEwith the unique name of the target cluster in all locations. -
Replace
MY_API_ENDPOINTwith the correct Virtana Service Observability API endpoint for your environment.
zenoss-agent-kubernetes.yml 1 2 3 4 5 6 7 8 9 10 11 12 13 14 15 16 17 18 19 20 21 22 23 24 25 26 27 28 29 30 31 32 33 34 35 36 37 38 39 40 41 42 43 44 45 46 47 48 49 50 51 52 53 54 55 56 57 58 59 60 61 62 63 64 65 66 67 68 69 70 71 72 73 74 75 76 77 78 79 80 81 82 83 84 85 86 87 88 89 90 91 92 93 94 95 96 97 98 99 100 101 102 103 104 105 106 107 108 109 110 111 112 113 114 115 116 117 118 119 120 121 122 123 124 125 126 127 128 129 130 131 132 133 134 135 136 137 138 139 140
apiVersion: v1 kind: ServiceAccount metadata: name: zenoss-agent-kubernetes namespace: default --- apiVersion: rbac.authorization.k8s.io/v1 kind: ClusterRole metadata: name: system:zenoss-agent-kubernetes labels: kubernetes.io/bootstrapping: rbac-defaults rules: - apiGroups: [""] resources: ["namespaces", "nodes", "persistentvolumeclaims", "persistentvolumes", "pods", "services"] verbs: ["get", "list", "watch"] - apiGroups: ["apps"] resources: [ "deployments", "statefulsets"] verbs: ["get", "list", "watch"] - apiGroups: ["events.k8s.io"] resources: ["events"] verbs: ["get", "list", "watch"] - apiGroups: ["metrics.k8s.io"] resources: ["nodes", "pods"] verbs: ["get", "list", "watch"] --- apiVersion: rbac.authorization.k8s.io/v1 kind: ClusterRoleBinding metadata: name: zenoss-agent-kubernetes roleRef: apiGroup: rbac.authorization.k8s.io kind: ClusterRole name: system:zenoss-agent-kubernetes subjects: - kind: ServiceAccount name: zenoss-agent-kubernetes namespace: default --- apiVersion: v1 kind: ConfigMap metadata: name: zenoss-agent-kubernetes-configs data: agent.yaml: | agent: name: zdatamon source: MY_CLUSTER_NAME defaultInterval: 300s configurationSource: local: - name: "default local config" directory: "/etc/zdatamon/configs" datasinks: - name: zenoss type: zenoss conf: address: MY_API_ENDPOINT:443 apiKey: _ZDM_ENV_ZENOSS_API_KEY logconfig.props: | default:info datasource.kubernetesagent:info datasink.zenoss:error --- apiVersion: v1 kind: ConfigMap metadata: name: zenoss-agent-kubernetes-ds-configs data: kubernetesagent.yaml: | apiVersion: v1 kind: datasource name: kubernetesagent spec: type: kubernetesagent datasource: interval: 300s customClusterName: MY_CLUSTER_NAME clusterName: MY_ACTUAL_CLUSTER_NAME --- apiVersion: apps/v1 kind: Deployment metadata: name: zenoss-agent-kubernetes namespace: default labels: app: zenoss-agent-kubernetes spec: replicas: 1 selector: matchLabels: name: zenoss-agent-kubernetes template: metadata: labels: name: zenoss-agent-kubernetes spec: serviceAccountName: zenoss-agent-kubernetes containers: - name: zenoss-agent-kubernetes image: "zenoss/zdatamon:v1.2.0" imagePullPolicy: IfNotPresent args: - /bin/zdm - run - --config-file=/etc/zdatamon/agent.yaml - --logconfig=/etc/zdatamon/logconfig.props - --logconfig-watch env: - name: K8S_NAMESPACE valueFrom: fieldRef: apiVersion: v1 fieldPath: metadata.namespace - name: K8S_POD valueFrom: fieldRef: apiVersion: v1 fieldPath: metadata.name - name: ZENOSS_API_KEY valueFrom: secretKeyRef: name: zenoss key: api-key resources: {} volumeMounts: - name: zdatamon-configs mountPath: /etc/zdatamon - name: zdatamon-ds-configs mountPath: /etc/zdatamon/configs volumes: - name: zdatamon-configs configMap: name: zenoss-agent-kubernetes-configs - name: zdatamon-ds-configs configMap: name: zenoss-agent-kubernetes-ds-configs -
-
Install the agent in the cluster. Run the following command:
kubectl apply -f zenoss-agent-kubernetes.yml
After installing the agent, create a dashboard using the Kubernetes template. In Dashboards, copy the Kubernetes dashboard template, then rename it, adjust the scope, and change the source to the name of the cluster that you chose when installing the agent.
For more information, see copy a template or create a new dashboard.
Manage the agent using kubectl commands
To view the agent logs, run the following command:
kubectl logs -f deployment zenoss-agent-kubernetes
To update the agent, first edit its configuration file, then apply the file. Kubernetes applies only the changes. Run:
kubectl apply -f zenoss-agent-kubernetes.yml
To remove the agent and all of its resources, run the following command:
kubectl delete -f zenoss-agent-kubernetes.yml