Policy service
You can use the policy service for centralized data and operations management, which uses declarations rather than code.
Opening the policy service
You can examine policies from the following location:
- The Virtana Service Observability header is visible on all tabs. In the header, click ADMIN, then Policy.
Note
Your account must be assigned the Manager role to create and manage policies.
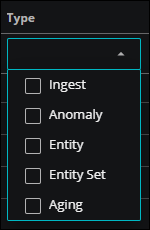
Policy types
Policy types include Ingest, Anomaly, Entity, Entity Set, and Aging. A datasource associates an incoming stream of data with one or more policies. Policies are not used unless they are included in a datasource.
Let's take a closer look at the commonly used policy types:
Ingest policies
Transform incoming data with ingest policies.
Separate metadata from data in incoming metric data streams to create distinct entities and metrics without writing customized ETL scripts. Or add metadata to event data streams to categorize events or facilitate action service processing.
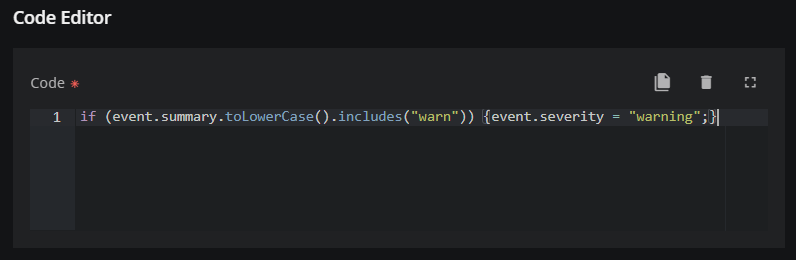
Code assistant
When adding an ingest policy, you can customize it with Javascript code. If you need help entering your Javascript code, Virtana provides a code assistant to help you get started. Click the Suggest (lightbulb icon) button to open the code assistant.
In the Prompt section, enter text in plain English that describes what you want to do. For example, you might want to change the severity and modify the summary. In this example, the prompt is:
Increment the event's severity if its summary includes "ERROR"
After you enter your prompt, click SUBMIT to view the resulting Javascript.
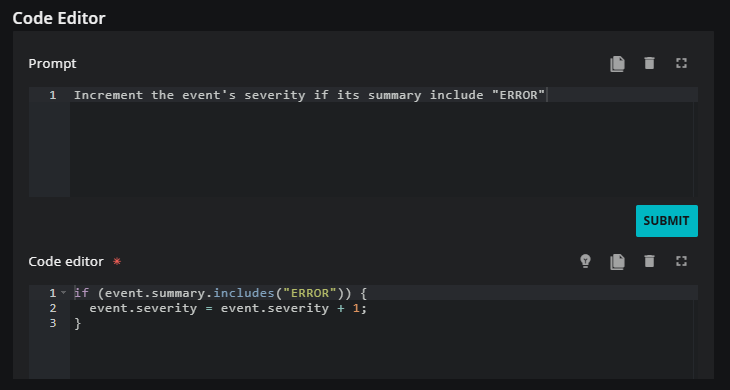
This assistant is designed to provide a starting point for your code. You might need to make adjustments to the initial prompt or the resulting code for it to work as expected.
Entity policies
Identify entity types with entity policies.
Provide a tag for instances of an entity type, or standardize metadata from different sources so that, for example, all Kubernetes clusters have the same tags and can be easily found.
Anomaly policies
Manage anomaly detection with anomaly policies.
Add or subtract metrics from the list of metrics for which the anomaly detection service trains models. For more information about anomaly policies, see Anomaly dectecton service.
Event aging policy
Manage closing events with the event aging policy.
This global policy defines the conditions under which Virtana Service Observability changes the status of inactive events to Closed. When these events are closed, the Closed Reason shows as Aged in the Events console. The eventAging_default policy is automatically enabled.
The eventAging_default policy uses severity level to determine when to close an event that hasn't been updated over a specified period of time:
-
For an event that has a severity level that is equal to Warning, Virtana Service Observability closes the event after one day.
-
For an event that has a severity level that is less than Warning, Virtana Service Observability closes the event after 2 hours. For example, events that are assigned a severity level of Info or Debug are automatically closed after 2 hours.
Events that are assigned a severity level of Critical or Error remain open. They are not aged under this policy.
When events are closed under the event aging policy, there is no data loss. You can still access and manage these events as needed.
Event aging policy and CZ configuration settings
The eventAging_default policy in Virtana Service Observability is independent from aging policies that you configure in Collection Zones. If you have set aging policies in CZ, they will continue to operate as configured. For more information, see Event configuration settings.
View the following table to see how the default values in the event configuration settings in CZ compare to the default values in the event aging policy.
| Severity | Cloud closure | CZ aging |
|---|---|---|
| Critical | Won't Close | Won't Age |
| Error | Won't Close | Won't Age |
| Warning | 24 hours | 4 hours |
| Info | 2 hours | 4 hours |
| Debug | 2 hours | 4 hours |
| Clear | 2 hours | 4 hours |
Important
You can override the global default event aging policy as needed. For example, you might want to align the policy with your CZ configuration settings. In such cases, remember that the event aging policy applies to all datasources and should only be configured to the default_default datasource.
Customizing policies
You don't need to customize any of the default policies that Virtana provides to monitor your environment. These policies have been tested extensively in production and work as designed.
In most cases, if you identify a need for a custom policy in your organization, we recommend that you contact Virtana Support for guidance. For example, if you wish to integrate an application or add a new, custom datasource, contact Virtana Support to arrange assistance creating a custom ingest or entity policy. However, if you want to customize an anomaly policy to add a metric to the anomaly detection service, you are welcome to do so at any time.
Override a default policy
You might determine that you want to override a default policy. For example, you might want to adjust the criteria for closing inactive events in the aging policy. For such cases, perform the following steps:
-
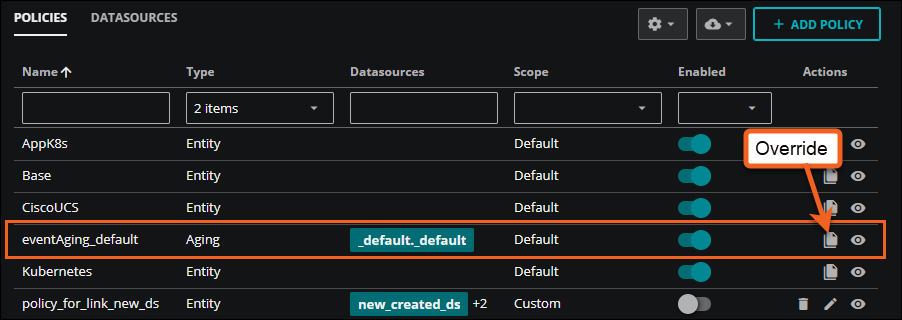
In the table of policies on the POLICIES tab, identify the policy to override.
-
In the Actions column of the row of the policy to override, click the Override policy icon.
-
A confirmation dialog box opens. Click Yes, override the default policy to continue, or click No, keep the default policy to cancel. When you choose to override a default policy, a new custom policy is created.
-
Locate the new custom policy in the table and click the Edit policy icon.
-
In the EDIT POLICY dialog box, make your changes and click SAVE.
Note
If you want to use the default policy instead of the custom policy, click REVERT TO DEFAULT in the EDIT POLICY dialog box. The custom policy is removed.
Adding a policy
In Policy, you can create new policies, including ingest, anomaly, entity, and entity set policy types. Each type of policy has its own criteria.
You must be assigned the Manager role to create a policy.
-
If you haven't already done so, open ADMIN > Policy and click the POLICIES tab.
-
In the upper-right corner, click ADD POLICY. The ADD POLICY dialog box opens.
The dialog box opens to the General info tab.
-
Set the Enabled option to activate the policy or deactivate it.
-
In the Name field, enter a name. Policy names can't be changed after the ADD POLICY dialog box is saved.
-
Select the type of policy you want to create. In the Type field, select one of the following types.
The Add Policy dialog box updates to the type of policy you select:
-
Ingest. To continue adding an ingest policy, see Add an ingest policy.
-
Anomaly. To continue adding an anomaly policy, see Add an anomaly policy.
-
Entity. To continue adding an entity policy, see Add an entity policy.
-
Entity Set. To continue adding an entity set policy, see Add an entity set policy.
-