Monitoring templates
Collection Zone stores performance configuration data in templates. Templates contain other objects that define where and how to obtain performance data, thresholds for that data, and data graphs.
You can define a template anywhere in the device class hierarchy or on an individual device.
Templates are divided among three types:
- Device
- Component
- Interface
Template binding
The determination of which templates apply to what objects is called binding. Templates are bound in different ways, depending on the objects to which they are bound.
Device templates
Device templates are applied to devices, one to each device. The system employs a single rule to bind device templates to devices: the value of the zDeviceTemplates property. For most device classes, this is "Device".
Common device templates are:
- Device
- Apache
- Active Directory
- MSExchangeIS
- MSSQLServer
- IIS
For the /Server/Linux/Apache device class, the zDeviceTemplates property might contain, for example, "Device" and "Apache". The system would collect CPU and memory information by using the Device template, and Apache-specific metrics by using the Apache template.
Binding a device template
To bind a device template to a device class or device:
-
From the devices list, select a device class or device.
-
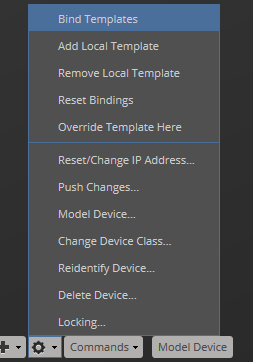
On the Overview page, select Bind Templates from the Action menu.
-
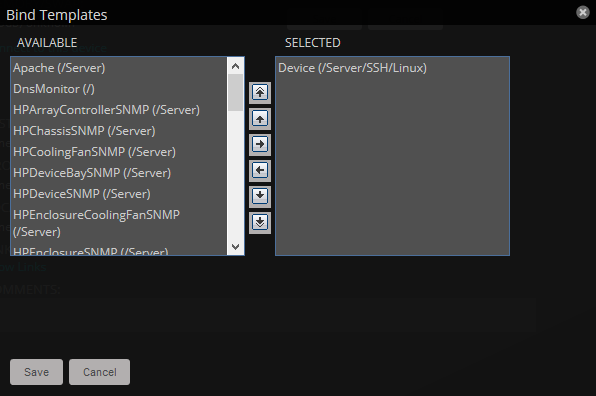
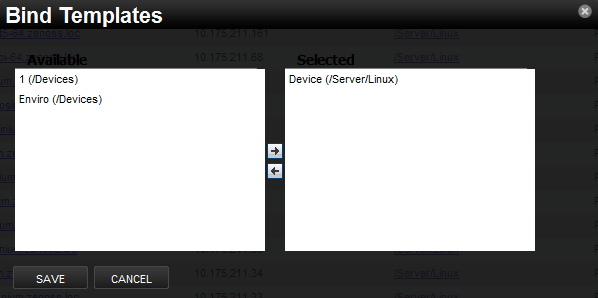
In the Bind Templates dialog box, use the arrows to move templates between the Available and Selected lists.
-
Click Save.
Editing templates bound to a device
Select the templates that are bound to a device.
-
From the main navigation menu, choose INFRASTRUCTURE.
-
From the device list in the left pane, choose a device.
-
Below the device list, click the context-sensitive actions menu and choose Bind Templates.
-
From the list of available templates, move one or more templates to the selected list.
-
Click Save.
Resetting bindings
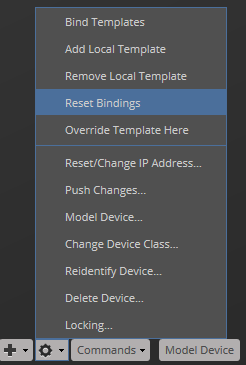
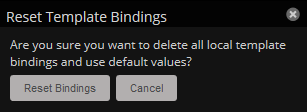
Resetting template bindings removes all locally bound templates and uses the default template values. To reset bindings for a selected device or device class:
-
From the Action menu, select Reset Bindings.
-
In the Reset Template Bindings dialog box, click Reset Bindings to confirm the action.
Component templates
Component templates are named exactly according to the name of the underlying class that represents a component. For example,the FileSystem template is applied to file systems. Component templates can be applied multiple times to each device, depending on how many of the device's components match the template. Configuration properties do not control the application of component templates.
Do not manually bind component templates
Component template binding relies on the template name matching the component type. Manually binding component templates can have adverse effects on monitoring.
Common component templates are:
- FileSystem, HardDisk, IPService, OSProcess, WinService
- Fan, PowerSupply, TemperatureSensor
- LTMVirtualServer, VPNTunnel
Do not rename component templates
Altering the name of a component template will prevent it from matching its associated component type.
For example, the FileSystem component template automatically applies to
components of the FileSystem type. Renaming the template to
FileSystem_Custom would prevent a match with FileSystem components.
Interface templates
Most interface templates are applied to network interfaces by using a special type of binding. Instead of using the name of the template's underlying target class, the system looks for a template with the same name as the interface type. You can find this type in the details information for any network interface.
For these standard interfaces when a Collection Zone cannot locate a
template that matches the interface type, then it uses the
ethernetCsmacd template.
Some vendors provide expanded monitoring capabilities on their
interfaces. In some cases, ZenPacks provide custom templates specific to
those types that can override this default behavior. A common example
would be the Ethernet Interfaces interface type built to
monitor these expanded capabilities for Cisco network interfaces. In
this case the template's target class is used to bind the
EthernetInterface template.
For more information about these expanded interface capabilities, refer to the Cisco Monitor ZenPack page.
Template management
Creating templates
You can create an empty template to customize to your needs. To create a new template:
-
Select ADVANCED > MONITORING TEMPLATES.
-
Click the "add a monitoring template" button ("plus" icon, lower-left corner).
-
In the Add Template dialog box, provide a name, and then choose a template path.
-
Click Submit.
Copying templates
You can create a template by overriding an existing template. To override a template:
-
Navigate to the template you want to copy.
-
From the Action menu, select Copy/Override Template.
-
In the Copy/Override dialog box, select the bound template to override
-
Click Submit.
Renaming templates
To rename an existing template:
-
Select ADVANCED > MONITORING TEMPLATES.
-
Expand the organizer containing the template to be renamed, and then the class containing the template.
-
From the Action menu, select View and Edit Details.
-
In the Edit Template Details dialog box, enter a new name.
-
Click Submit.
Template contents
Monitoring templates determine how the system collects performance data for devices and device components. You can define monitoring templates for device classes and individual devices.
Templates comprise the following types of objects:
- Data sources specify the exact data points to collect and the collection method to use.
- Thresholds define expected bounds for collected data, and specify events to be created if the data does not match those bounds.
- Graph definitions describe how to graph the collected data on the device or device components.
Before the system can collect performance data for a device or component, it must use the template binding process to determine which monitoring templates apply.
To view monitoring templates, from the main navigation menu, choose ADVANCED > Monitoring Templates.
Data sources
Data sources specify which data points the system collects and how to collect them. Each monitoring template comprises one or more data sources. The system provides the following built-in data source types. ZenPacks provide other data source types.
-
SNMP - Define data to be collected via SNMP by the ZenPerfSNMP daemon. You specify which SNMP OID to collect. (Many OIDs must end in .0.) Because SNMP data sources specify only one performance metric, they contain a single data point.
-
Command - Specify data to be collected by a shell command that is executed on the collector appliances or on a monitored device. The ZenCommand daemon processes COMMAND data sources. A COMMAND data source can return one or more performance metrics, and usually has one data point for each metric.
Shell commands that are used with COMMAND data sources must return data that conforms to the Nagios® plug-in output specification.
Adding a data source to a monitoring template
- From the navigation menu, choose ADVANCED > MONITORING TEMPLATES.
- In the tree view, select the monitoring template.
- In the Data Sources area, click Add.
- In the Add Data Source dialog box, enter a name for the data source, select the type, and then click Submit.
-
Double-click the new data source.
An Edit Data Source dialog box appears, specific to the data source type. For example, the following figure shows the Edit Data Source dialog box for a COMMAND data source.

-
Enter or select values to define the data source.
For example, the COMMAND data source type, Use SSH must be enabled. Otherwise, the commands only run locally on the collector that is assigned to the device to which the monitoring template is bound.
In the Command Template field, enter the command to run. Note that any command that you enter in this field is first evaluated for TALES expressions. You might need to escape certain characters.
For more information, see TALES reference.
For more information on COMMAND type data sources, see zencommand.
Data points
Data sources can return data for one or more performance metrics. Each metric that a data source retrieves is represented by a data point.
You can define data points for data sources with all source types except SNMP and VMware. Because these data source types each rely on a single data point for performance metrics, additional data point definition is unnecessary.
- From the navigation menu, choose ADVANCED > MONITORING TEMPLATES.
- In the Data Sources area, highlight the row that contains the datasource.
- From the action menu, choose Add Data Point.
-
In the Add Data Point dialog box, enter a name for the data point, and then click Submit.
Note: For COMMAND data points, enter the name that the shell command uses when returning data.
-
Double-click the new data point and enter information or make selections to define it:
- Name - Displays the name that you entered in the Add a New Data Point dialog box.
-
RRD Type - Review the following considerations, and then specify the data source type to use for storing data for this data point.
The following considerations apply to COUNTER and DERIVE types
- In graph legends, the minimum and maximum values are the actual calculated rates for the time period covered by the graph. However, in the graph, as you zoom out, increasing the time frame, minimum and maximum values are averaged; thus values might be different.
- Instead of COUNTER, you could choose DERIVE and specify a minimum of 0. This approachcreates the same conditions as COUNTER, with one exception. Because COUNTER is a "smart"data type, it can wrap the data when the system reaches a maximum number of values. If a reporting loss occurs, the system (when looking at COUNTER values) might erroneously wrap the data, thereby creating an artificial spike in the system and statistical anomalies.
- COUNTER - Saves the rate of value change over a step period (interval). COUNTER assumes that the value is always increasing (the difference between the current and the previous value is greater than 0). Example use: Traffic counters on a router.
- DERIVE - Same as COUNTER, but allows negative values. Example use: To see the rate of change in free disk space on a server.
- GAUGE - Does not save the rate of change, but saves the actual value. There are no divisions or calculations. Example use: To see memory consumption in a server.
- ABSOLUTE - Saves the rate of change, but assumes that the previous value is set to 0. The difference between the current and the previous value always equals the current value.Thus, ABSOLUTE stores the current value, divided by the step interval.
-
Create Command - Enter an RRD expression that is used to create the database for this data point. If you do not enter a value, then the system uses a default that is applicable to most situations.
- RRD Minimum - Enter a value. This system ignores values less than this number.
- RRD Maximum - Enter a value. This system ignores values greater than this number.
-
Click Save.
Thresholds
Thresholds are used to define noteworthy changes to a data point value in the form of an event.
For more information on the types of thresholds available, see thresholds.
Graph definitions
Graph definitions define which data points (and associated thresholds, if any) are graphed in the user interface.
For more information on the options available in a graph definition, see performance graphs.