Adding devices manually
You can manually add one or more devices to the database. When adding devices, you choose the device class and whether Collection Zone models the device immediately.
Adding a single device
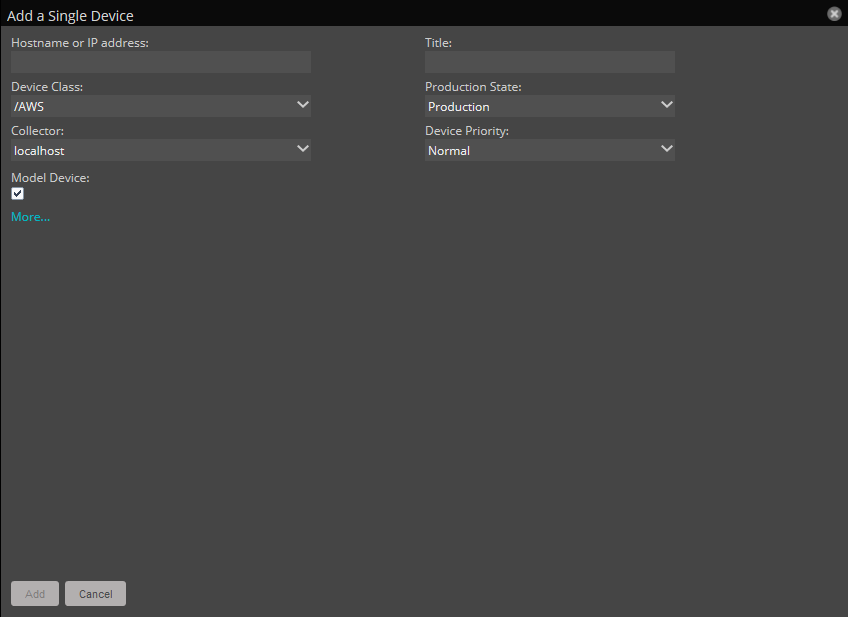
When you manually add a device, information that you provide might conflict with information that the system discovers about the device. Therefore, in most cases, you can add a device by providing only the following required information.
- Hostname or IP address - Enter the network (DNS) name or IP address of the device.
- Device Class - Select a device class to which this device will belong. For example, if the new device is a Linux server, then select /Server/Linux.
- Collector - By default, this is localhost. Select a collector for the device.
The exception is adding a Cisco router in a device class other than /Network. Before adding the device, set the value of the zIfDescription configuration property to True. By default, this option is set to True for the /Network class.
- From the navigation menu, select INFRASTRUCTURE > DEVICES.
-
Click the Add Devices icon and choose Add a Single Device.
-
Enter information or make selections to add the device. By default, Model Device is selected. If you do not want the device to be modeled when it is added, clear the check box for this option.
- Optional: To display additional fields
that are specific to the chosen device class, click More. For example, on the expanded
page, you can
- Enter device-specific details.
- Edit SNMP settings.
- Set hardware and operating system information.
- Add device comments.
- Click ADD.
- Optional: To view the Add Device job in progress, click View Job Log in the notification that appears when you add the device.
When the job completes, the device is added in the selected device class.
Adding multiple devices
Follow these steps:
- From the Navigation menu, select INFRASTRUCTURE. The Devices page appears.
-
Click the Add Devices icon and select Add Multiple Devices. The Add Infrastructure page appears.
-
Select the category, type, and connection information for each device that you want to add, and then click Add.
- After adding devices, click Done.
Adding a Cisco UCS device
The Cisco Unified Computing System (UCS) is a data center server computer product line that is composed of computing hardware, virtualization support, switching fabric, and management software. You can add a UCS Manager or a Cisco Integrated Management Controller (CIMC), which manages and monitors C-Series and E-Series rack servers, to the applicable /CiscoUCS device class.
- From the Navigation menu, select INFRASTRUCTURE > Devices.
-
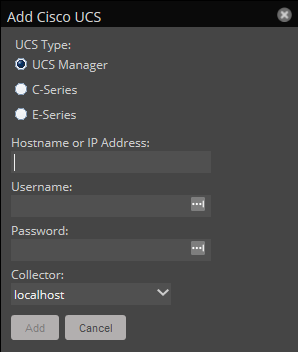
From the Add Devices icon, choose Add Cisco UCS.
-
Choose the UCS device type:
- UCS Manager
- C-Series
- E-Series
- Complete the dialog box with the hostname or IP address, the user name and password, and select the collector for this device, and then click Add.
- Optional: To view the Add Device job in progress, click View Job Log in the notification that appears.
Add VMware vSphere endpoint
Follow these steps to add a vSphere endpoint:
- From the Navigation menu, select INFRASTRUCTURE > DEVICES.
-
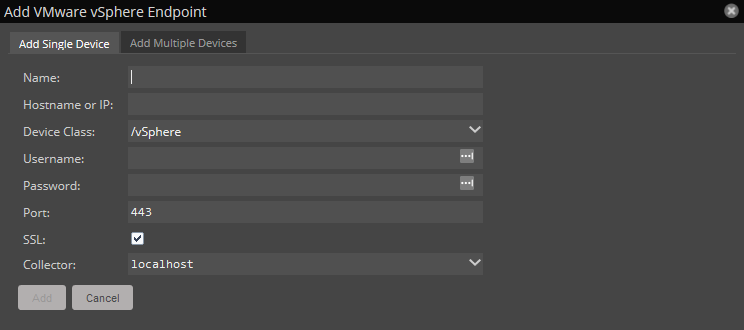
From the Add Devices icon, select Add VMware vSphere Endpoint. The Add VMware vSphere Endpoint page appears with the Add Single Device tab selected.
-
If you want to just add a single device, complete the dialog with the appropriate information, then click Add.
-
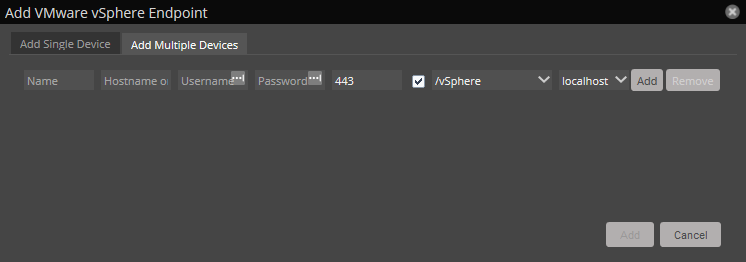
If you want to add multiple devices at once, click the Add Multiple Devices tab.
-
Fill out the information in the row for a device and click Add. A new row appears and you can add another device. When you are finished be sure to click the Add button at the bottom of the dialog to add all of your devices.