Filtering dashboard tiles
You can filter individual tiles in your dashboard. This is useful if you need to compare different services side-by-side. For example, maybe you want to compare the performance of your services in different regions.
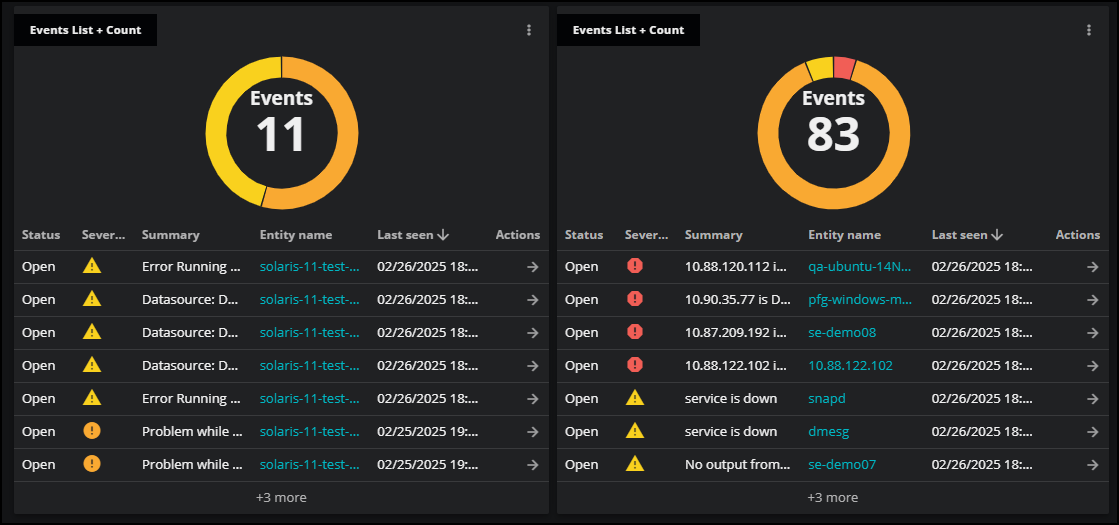
In the following image, the dashboard contains two Events List + Count tiles. One tile (left) is filtered to show names containing Solaris and the other tile is filtered to show names not containing Solaris. This side-by-side comparison can help you investigate issues and better understand your data.
You can apply tile filters on all tile types except Clock, Emoji, and Notes tile types. When you apply the tile filter, it will remain active for all future sessions. To change or remove the filter, open Tile Configuration and delete the filter.
Add a filter to your dashboard tile
To filter a tile, do the following:
-
Click the Actions menu for the tile and select Edit. The Tile Configuration panel opens.
-
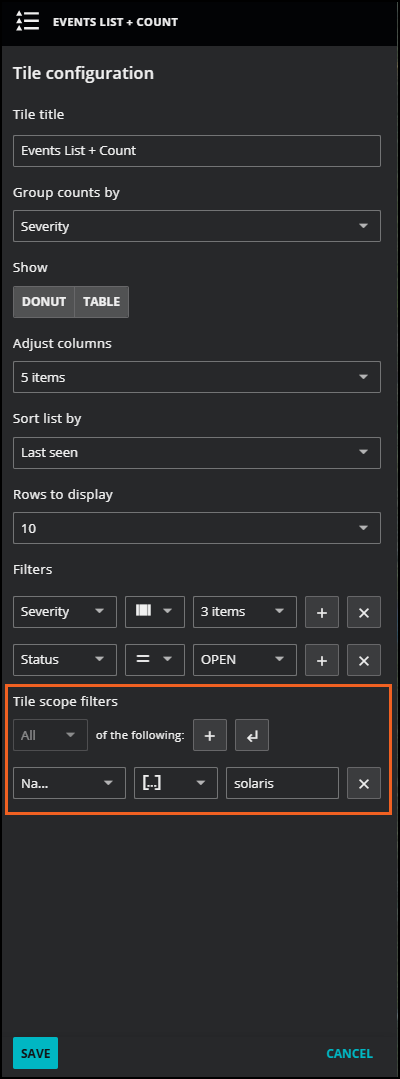
In the Tile scope filters section, use the query builder to filter the tile.
-
Click the + (plus sign) to add a clause.
-
To define the clauses, click in the first field to select an entity field. This field offers suggestions based on the user-friendly names in the Dictionary or from live data in your system.
-
Select your operator, then select your value. Start typing in the value field for autosuggestions based on your selected entity field.
-
To add another simple clause or add a compound clause, use the buttons in the top of your query. To remove all the clauses, click the X button in the top of the query.
-
-
When finished, click SAVE to return to your dashboard.