Installing in an Oracle Cloud Infrastructure region
Use the procedures on this page to install the collector virtual appliance as a managed virtual machine in an Oracle Cloud Infrastructure (OCI) compartment.
Prerequisites
To perform this task, you need:
-
An OCI tenant with one or more compartments in the root compartment.
-
An OCI tenant login with sufficient privileges to upload files in Object Storage and to deploy a VM.Standard2.2 instance shape in your preferred region.
-
The public key of a public/private key pair, in PEM format, for establishing an SSH or VNC connection.
-
Permission to download files from delivery.zenoss.io.
Customers can obtain permission by filing a ticket at the Virtana Support site.
Procedures
Follow these steps to install in an OCI compartment:
Downloading the appliance package file
Follow these steps to download the package file from the Virtana Delivery site:
-
In a web browser, navigate to delivery.zenoss.io, and then log in.
-
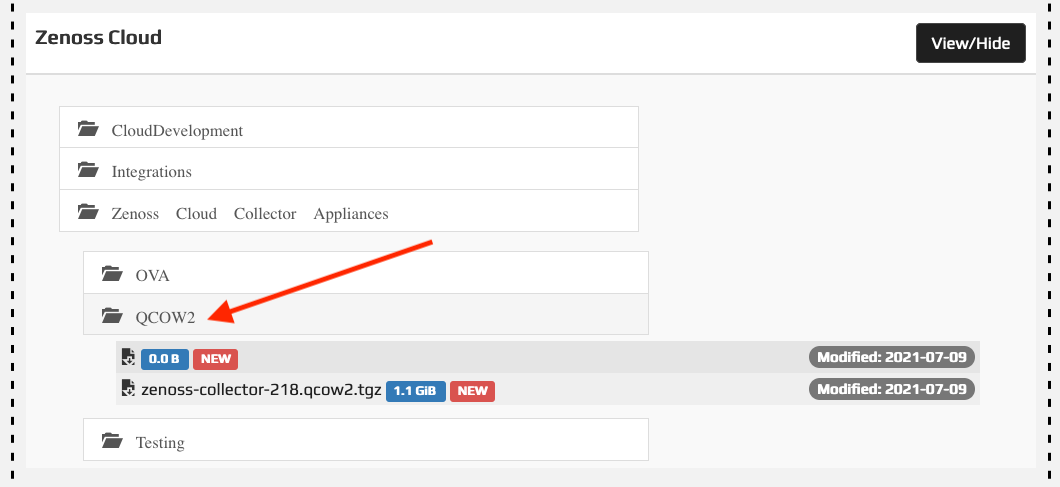
Display the Virtana Service Observability files.
-
Download the collector QCOW2 distribution file.
In the preceding example, the filename is
zenoss-collector-218.qcow2.tgz. (The version number may be greater than 218.)Make sure you have the latest distribution
Always use the latest QCOW2 distribution file. For example, if you downloaded a QCOW2 file for a previous installation, please verify that its file name is identical to the latest file available on delivery.zenoss.io before proceeding. New collectors should always be installed with the latest QCOW2 distribution file.
Uploading the appliance package to an OCI storage bucket
Follow these steps to upload the appliance package file to an OCI storage bucket:
-
Log in to the OCI web interface.
The web interface displays the last page you visited during your previous session.
-
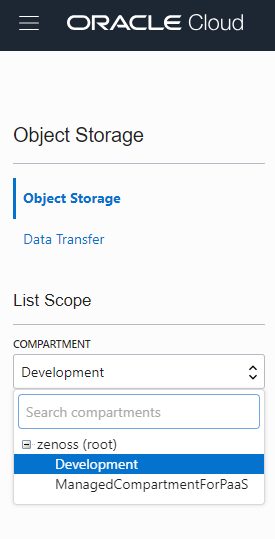
From the main menu, select Object Storage > Object Storage.

-
Under List Scope in the left column, select the compartment in which the virtual appliance will be deployed.
-
In the main column, select or create a bucket for the appliance package file.
-
On the Bucket Details page, click Upload Object to upload the appliance package file.

Warning
The OCI web interface may hang during the upload. If you are unable to upload the file using the web interface, use the OCI command-line interface to upload the file.
Importing an image from the appliance package
Follow these steps to import a disk image from the appliance package file:
-
On the Bucket Details page, click the Details option from the menu of the uploaded appliance package.

-
In the Object Details dialog box, highlight the object URI and copy it.

-
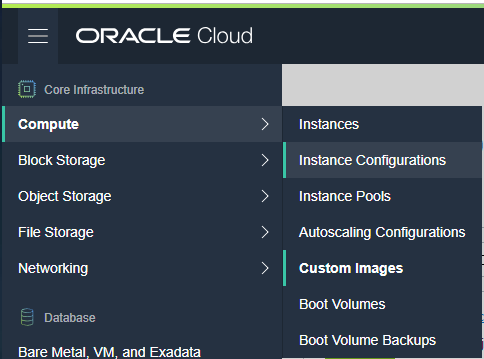
From the OCI main menu, select Compute > Custom Images.
-
On the Compute > Custom Images page, click Import Image, and then populate the Import Image dialog box.
-
From the CREATE IN COMPARTMENT list, select a compartment for the new image.
-
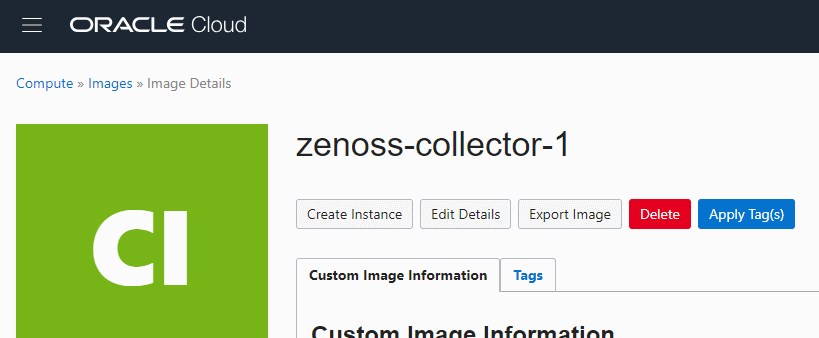
In the NAME field, enter a name for the image.
Virtana recommends using the name of the appliance package file, including the version number. For example,
zenoss-collector-1. -
From the OPERATING SYSTEM list, select LINUX.
-
In the OBJECT STORAGE URL field, paste the URI you copied in step 2.
-
From the IMAGE TYPE list, select QCOW2.
-
From the LAUNCH MODE list, select PARAVIRTUALIZED MODE.
-
Optional: In the TAGS area, add tags.
-
-
At the bottom of the Import Image dialog box, click IMPORT IMAGE.
Creating a virtual machine with the image
Follow these steps to create a virtual machine from the imported disk image:
-
From the Compute > Custom Images page, click the link of the newly-imported disk image.
-
On the Image Details page, click Create Instance.
-
On the Create Compute Instance page, specify the virtual machine to create.
-
In the Name your instance field, provide a name for the instance.
-
In the Select an availability domain for your instance area, select an availability domain for the instance.
-
In the Choose instance type area, select Virtual Machine.
-
In the Choose instance shape area, select
VM.Standard2.2. -
In the Configure networking area, specify the virtual cloud network that contains the devices that Virtana Collector will monitor.
-
-
At the bottom of the Create Compute Instance page, click Create.
The OCI web interface creates and displays a page for the new instance, and updates the page with progress information.
Creating a console connection to the virtual machine
Follow these steps to create a console connection to the new virtual machine:
-
From the Instance Details page of the new virtual machine, verify that the system is running.
-
From the Resources menu in the left column, select Console Connection.

-
Click Create Console Connection.
-
In the Create Console Connection dialog box, provide an SSH public key, and then click Create Console Connection.
-
From the menu of the new console connection, select SSH or VNC.
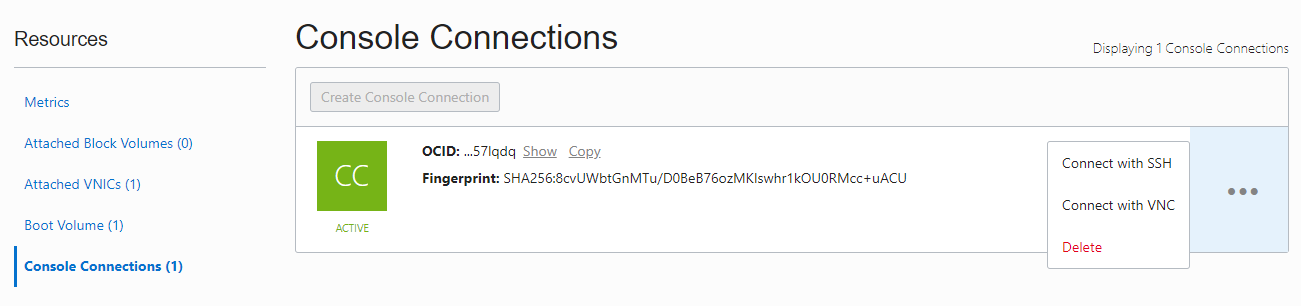
-
From the connection dialog, select a workstation platform, and then copy the connection string.
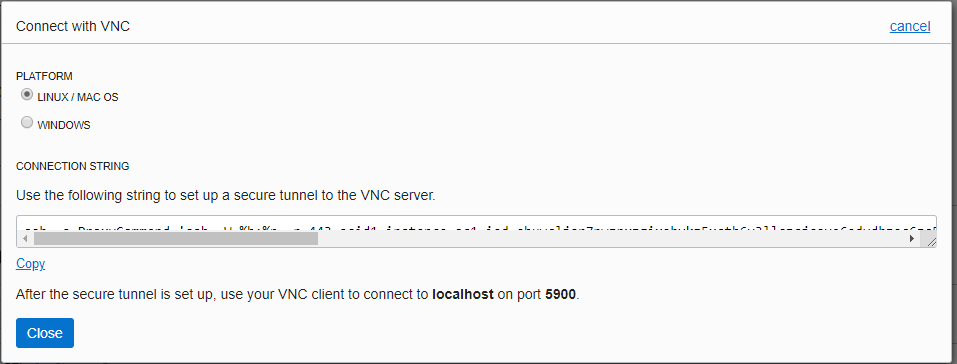
-
Open your terminal client, and then paste the connection string into the session window.
Configuring collector networking
The default configuration of a collector virtual machine uses DHCP to obtain IPv4 and IPv6 addresses. Use this procedure to configure static addressing, specify DNS servers in your environment, and specify search domains. The latter two are commonly required to resolve the names of devices in your network environment.
Warning
Please do not change the virtual machine hostname.
-
Gain access to the console interface of the virtual machine through your hypervisor or through a remote shell utility such as PuTTY.
-
Log in to the system as user
ccuser, passwordzenoss. -
Enter a new, secure password when prompted and keep a secure record of the chosen password.
-
In the appliance menu, select Configure Network, and then press Enter.

-
In the NetworkManager TUI, use the arrow key to select Edit a connection, and then press Enter.
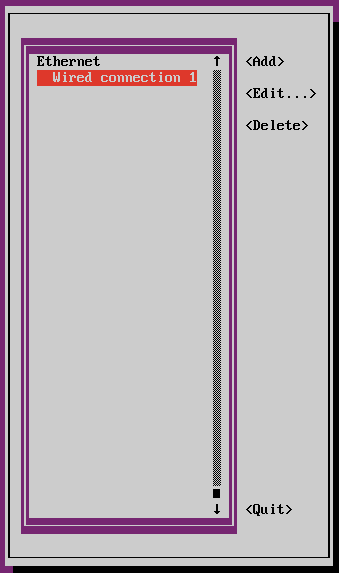
Make sure you edit the Wired connection interface. Currently, a few known issues can cause other, incorrect interface names to appear—for example, ensplan. Please ignore those.
-
From the Ethernet interfaces, select Wired connection 1, and then use the right and down arrow keys to select <Edit...>. Press Enter.

-
In the Edit Connection area, use the TAB key to select the <Show> command next to IPv4 CONFIGURATION or IPv6 CONFIGURATION, and then press Enter.
-
Change <Automatic> to <Manual>, and then enter a static address in CIDR notation.
If no prefix size is specified, the default (
/32) is used.
-
In the DNS servers field, enter the IP address of one or more DNS servers in your environment.
-
In the Search domains field, enter one or more domain names used in your environment.
-
Use the TAB key to select OK, and then press Enter.
-
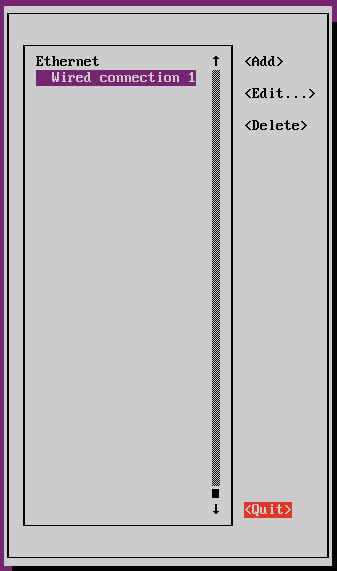
Use the down arrow key to select <Quit>, and then press Enter.
-
In the appliance menu, select Reboot Appliance, and the press Enter.
Next step
Connect to a Collection Zone (Initializing a collector appliance).