Managing users
Every user within Collection Zone has a unique user ID, which allows an administrator to assign group permissions and alerting rules that are unique to each user. Unique IDs also help ensure secure access to the system.
To create and manage user accounts, you must be logged in to the system admin account, or as a user with extended privileges.
Editing user accounts
Follow these steps to edit user account information:
-
In the Users list, click the name of the user to edit.
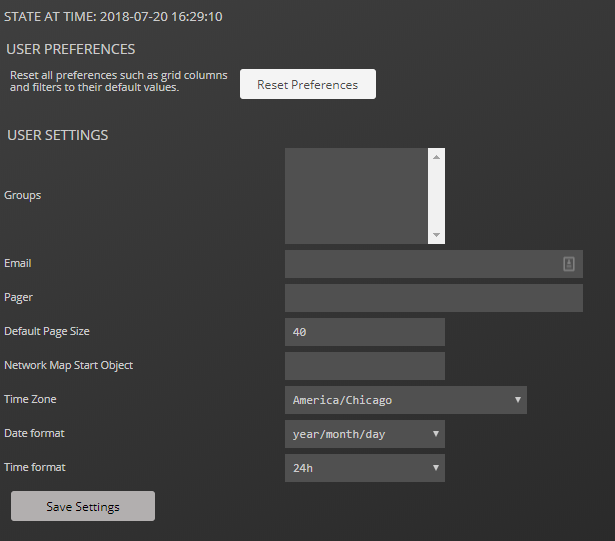
-
On the Edit page, modify settings as desired.
Option Description Reset Preferences Revert all settings to their default values. Groups Add the user to one or more Collection Zone groups. Email The email address of the user. Pager The phone number of the user's pager device. Default Page Size The default number of rows to include in Collection Zone tables. Network Map Start Object The IP address of a network, or the hostname or IP address of a device to display in the network map. Time Zone The time zone to use on all Collection Zone charts and graphs. Date format The date format to use on all Collection Zone charts and graphs. Time format The time format to use throughout Collection Zone. -
Click Save Settings.
Associating objects with specific users
You can associate any object in the system with a particular user, for monitoring or reporting purposes. Once associated with a user, you can then assign the user a specific role that applies to his privileges with respect to that object.
To create an object association:
- From ADVANCED > SETTINGS, select Users in the left panel.
- Click the name of a user.
-
From the Edit page, select Administered Objects in the left panel.
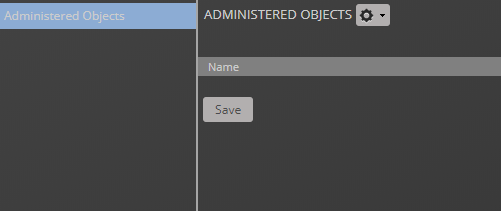
-
Select an object type from the ADMINISTERED OBJECTS Action menu. You can add:
- Device
- Device class
- System
- Group
- Location
-
Specify the component you want to add as an administered object, and then click OK.
The object appears in the Administered Devices list for the user.
-
Optional: Change the role that is associated for this user on this object.
Note: The default role assigned to the user for an administered object is specified by the Default Admin Role field on the Edit page.
-
Click Save to save changes.
Adding administrators
You also can associate an object with a user by adding an administrator to the object. Perform the following:
- Navigate to the object you want to add to the user's list of administered objects.
- Select Device Administration.
- Click the Add Administrator icon in the Administrators area. The Add Administrator dialog box appears.
- Select an administrator from the list and change the role if desired, then click SUBMIT.
The administrator appears in the object's Administrators list. The object is added to the administrator's Administered Objects list.