Installing in an Amazon Web Services region
Use the procedures on this page to install the collector virtual appliance as an Amazon Web Services (AWS) Elastic Compute Cloud (EC2) instance.
Prerequisites
To perform these procedures, you need:
-
An Amazon Web Services account with permission to run an
m4.xlargeinstance in EC2. -
An Amazon Virtual Private Cloud (VPC).
-
A named Amazon EC2 key pair.
-
The ID of the collector AMI to use.
The image ID varies by region; for more information, please contact Virtana Support.
Procedures
To install in an AWS region, first create an instance and then configure the instance.
Creating an instance
Follow these steps:
-
Log in to AWS and open the EC2 Dashboard page.
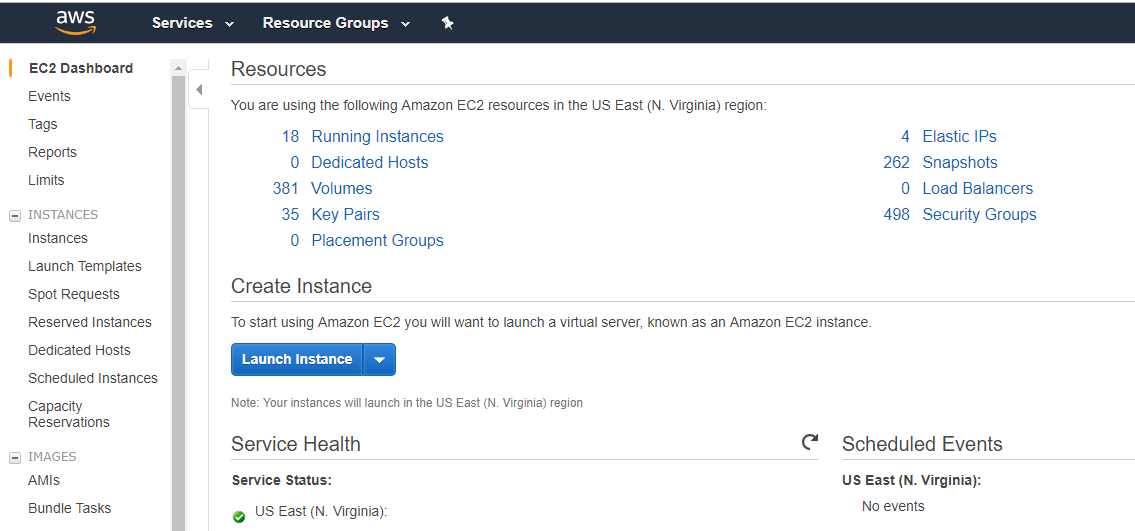
-
Under Create Instance, click Launch Instance.
-
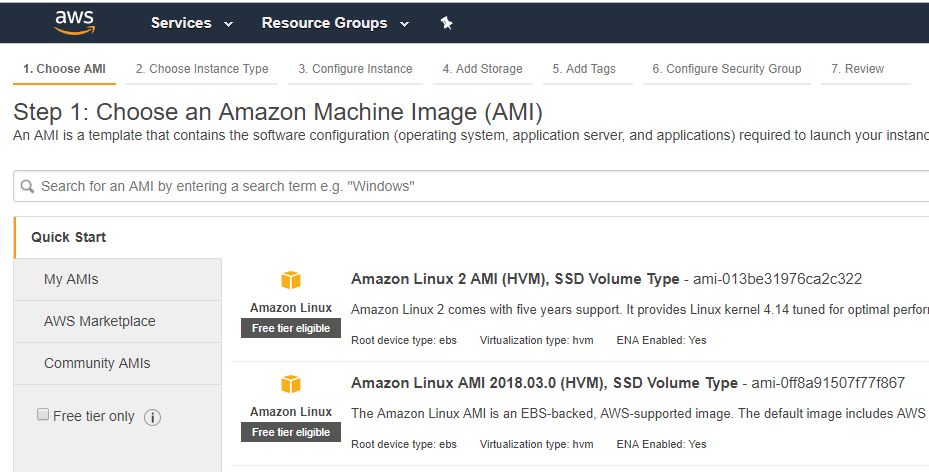
In the left column of the Step 1 page, click Community AMIs. If any filters are selected, deselect them.
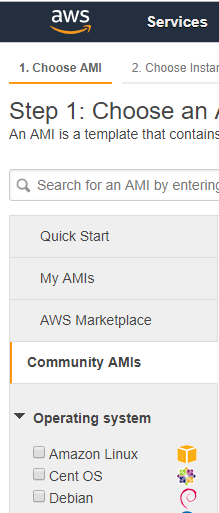
-
In the search field, enter zenoss-collector.
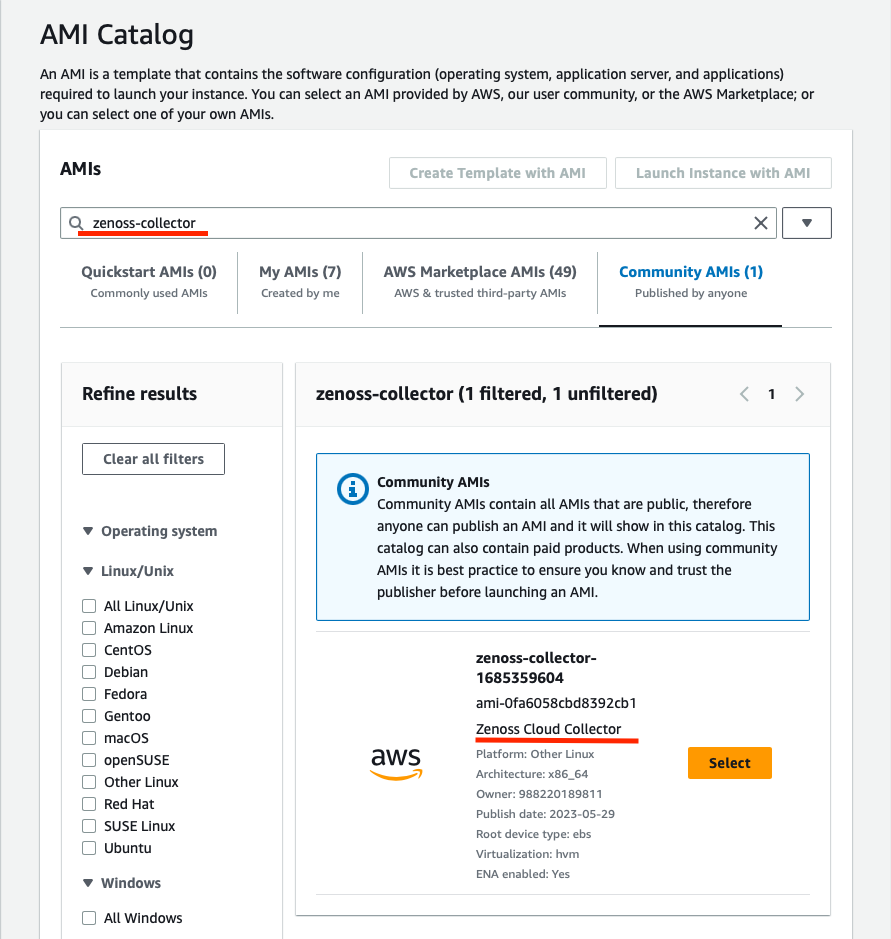
The AMI owner field should show account ID 988220189811.
The zenoss-collector image is available in the following regions:
- ap-northeast-1
- ap-northeast-2
- ap-northeast-3
- ap-south-1
- ap-southeast-1
- ap-southeast-2
- ca-central-1
- eu-central-1
- eu-north-1
- eu-west-1
- eu-west-2
- eu-west-3
- sa-east-1
- us-east-1
- us-east-2
- us-west-1
- us-west-2
Other AWS regions
To gain access to a collector AMI in an AWS region not included in the preceding list, please contact Virtana Support.
-
Click Select.
-
On the Step 2 page, select the
m4.xlargeinstance type (4 CPU, 16GB RAM, EBS storage).
-
At the bottom of the page, click Next: Configure Instance Details.
-
On the Step 3 page, configure the instance.
-
In the networking area, choose the VPC and subnet that contains the devices to monitor.
A public IP address is not required.
-
In the Network interfaces section, use the default configuration.
-
At the bottom of the page, click Next: Add Storage.
-
-
At the bottom of the Step 4 page, click Next: Add Tags.
The default storage of an
m4.xlargeinstance is sufficient. -
Optional: On the Step 5 page, add one or more tags, if desired.
-
At the bottom of the Step 5 page, click Next: Configure Security Group.
-
Optional: On the Step 6 page, create or select a security group.
Add a specific source IP address to the SSH rule, or a range of source IP addresses, if desired.
At the bottom of the Step 6 page, click Review and Launch.
-
On the Step 7 page, review the instance details, and then click Launch.
-
In the key pair dialog box, select a named key pair to use for gaining access to the collector console, and then click Launch Instances.
Configuring a collector instance
Follow these steps:
-
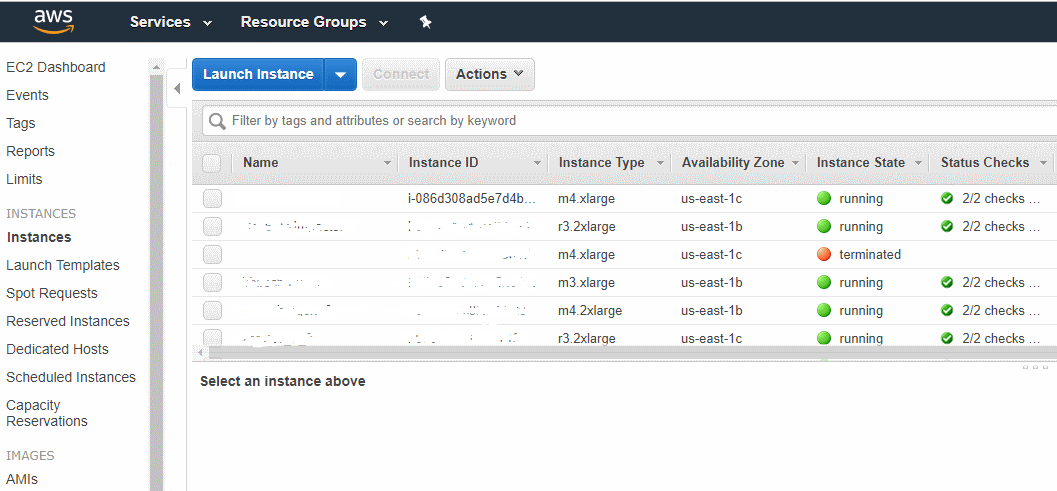
Log in to AWS and open the Instances page.
-
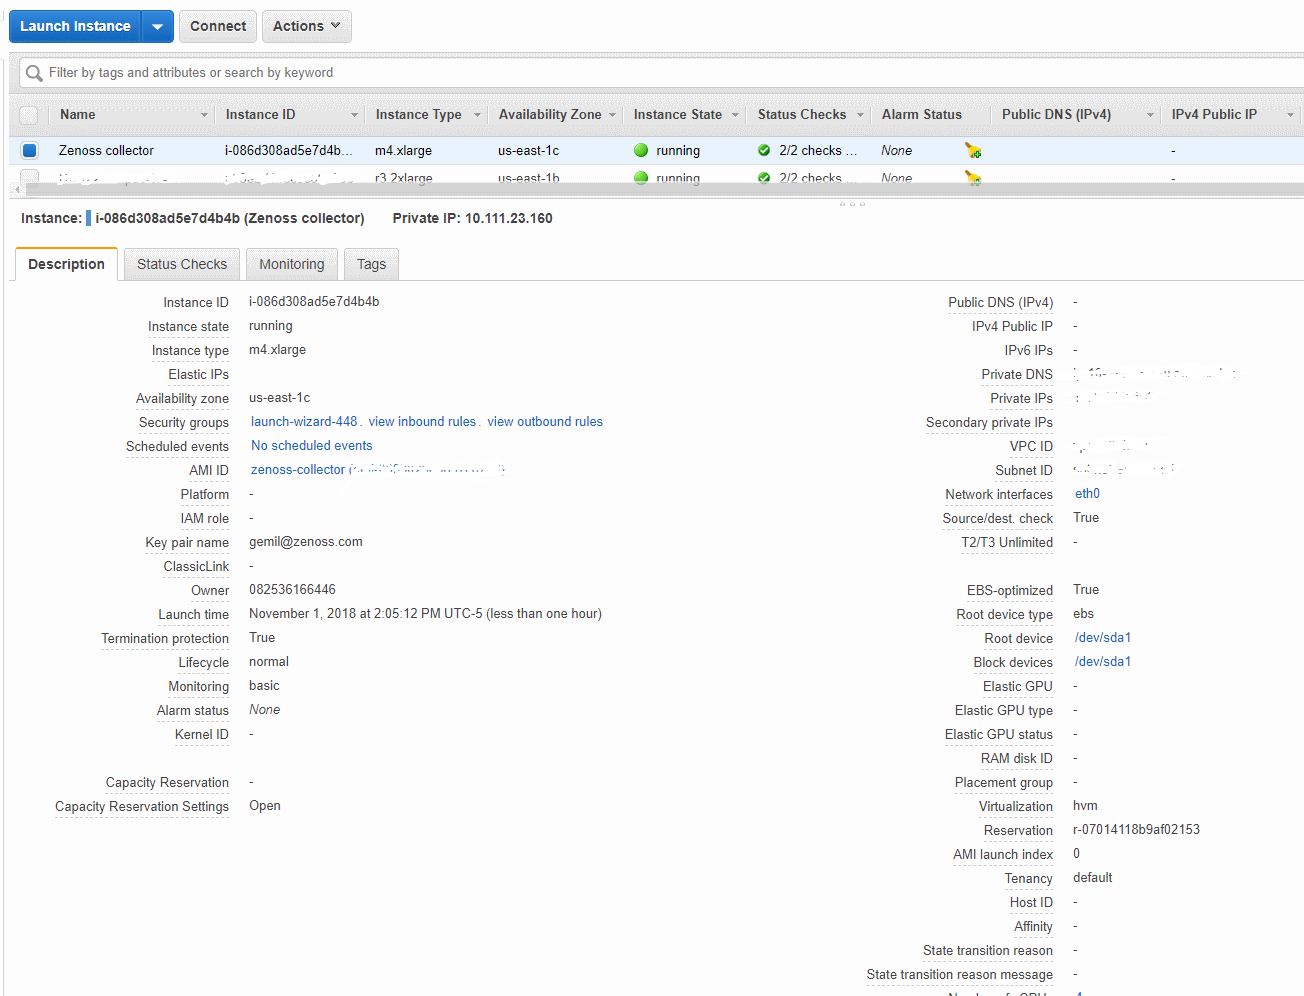
Select the instance you created in the previous procedure, and then give it a name.
-
When the Status Checks column shows 2/2 checks and a green check mark icon, scroll down to the Description area.
-
Review the networking requirements and edit the security group as required.
By default, AWS allows all outbound connections.
Optional: Set additional DNS search domains or SSH keys
You can customize DNS resolution for your virtual machine and grant access to additional users. The following options are supported:
- Additional DNS forwarding/DNS search domain entries
- A default resolver other than the one provided by AWS
- Additional SSH public keys
Example
For example, you wish to enable the following options for your virtual machine:
- Forward DNS queries for
*.example.comand*.example.orgto the203.0.113.4and203.0.113.5resolvers - Forward DNS queries for
*.myorg.example.netto the198.51.100.253resolver - Forward all other queries to the
192.0.2.2and192.0.2.3resolvers - Grant access to the private SSH keys associated with
public_key1andpublic_key2(through theccuseraccount)
To configure the options, create the following JSON object:
{
    "dns-forwarding": [
        {
            "dns-search": ["example.com", "example.org"],
            "dns-servers": ["203.0.113.4", "203.0.113.5"]
        },
        {
            "dns-search": ["myorg.example.net"],
            "dns-servers": ["198.51.100.253"]
        }
    ],
    "dns-default-servers": ["192.0.2.2", "192.0.2.3"],
    "sshkeys": [ "public_key1", "public_key2"]
}
Then, add the object to the user data section of your virtual machine configuration in the AWS web console.
Procedure
Virtual machine must be stopped to change DNS
In AWS, a virtual machine's DNS settings cannot be change unless it is stopped. This procedure includes a step for stopping the instance.
Follow these steps:
-
Create a JSON object that includes the options you wish to enable.
See the previous section for an example JSON object.
-
In the AWS web console, navigate to your virtual machine, then click on Instance state > Stop instance.
-
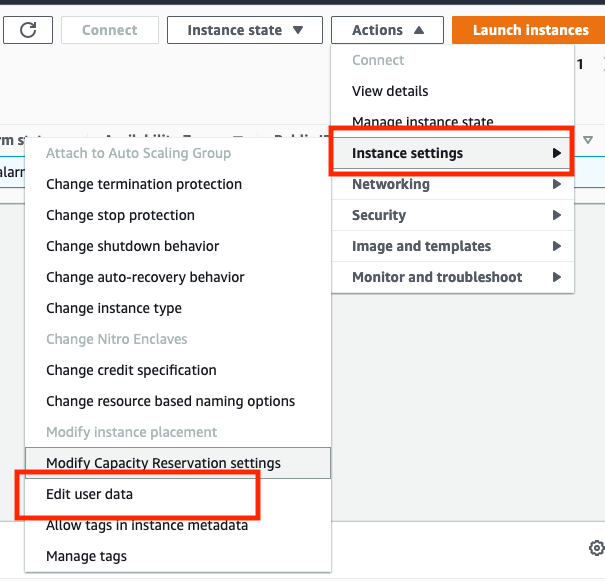
When the virtual machine is stopped, click on Actions > Instance settings > Edit user data.
The AWS console displays the submenu on the left.
-
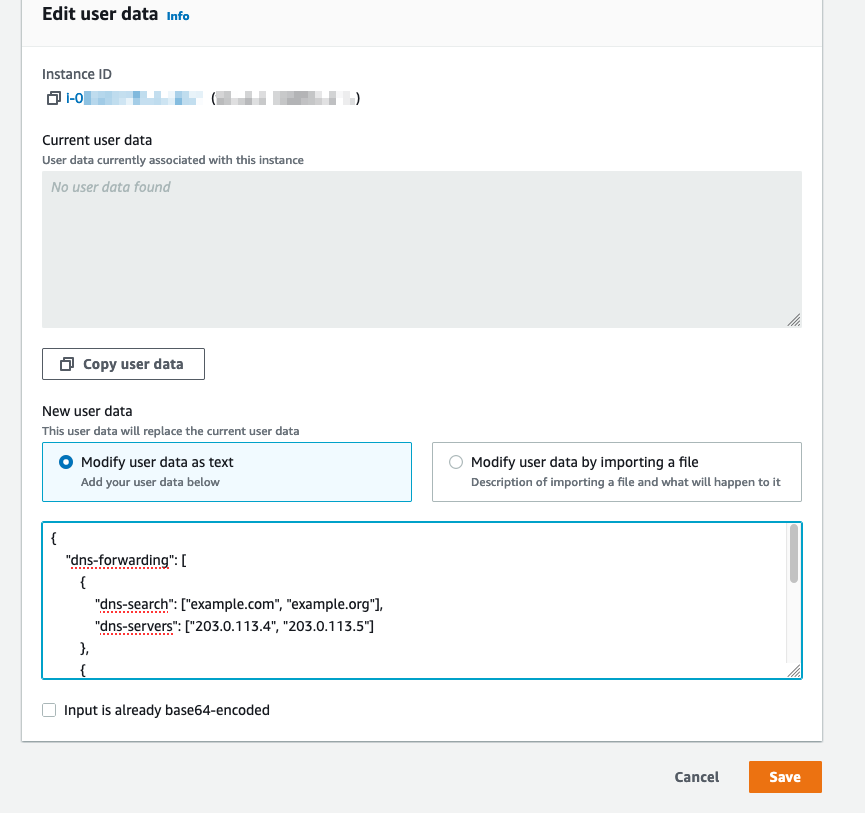
In the New user data area, configure your virtual machine.
- Click Modify user data as text.
-
In field below the control you clicked, paste your JSON object.
-
At the bottom of the page, click Save.
-
Start the virtual machine.
Next step
Connect to a Collection Zone (Initializing a collector appliance).