Installing in IBM Cloud
Use this procedure to install the Virtana Service Observability Collector virtual appliance as an IBM Virtual Infrastructure instance in the IBM Cloud platform.
Prerequisites
To perform this task, you need an IBM Cloud account with permissions to access the IBM Cloud Catalog and create virtual machines for VPC Infrastructure or access to Public Image Templates and create virtual machines for Classic Infrastructure.
Installing the collector
VPC Infrastructure
Note
The virtual appliance image for IBM Cloud's VPC Infrastructure is available in the us-east and us-south zones. To use the appliance in other regions, please contact your Virtana representative.
-
Log in to IBM Cloud as a user with permission to access the IBM Cloud Catalog and create virtual machines in the VPC Infrastructure.
-
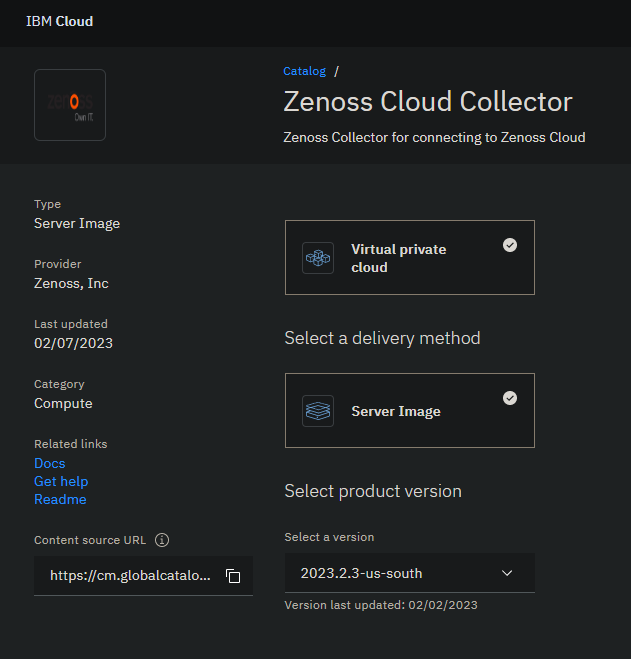
Navigate to the IBM Cloud Catalog, and then search for "Virtana Service Observability Collector".

-
Click on the Virtana Service Observability Collector card.
-
From the Select a version list, select the version for your region.
Version names begin with the date they were built and end with the region in which they are valid. Always choose the most recent version and the correct region for your deployment.

-
In the bottom-right corner, click Continue.
-
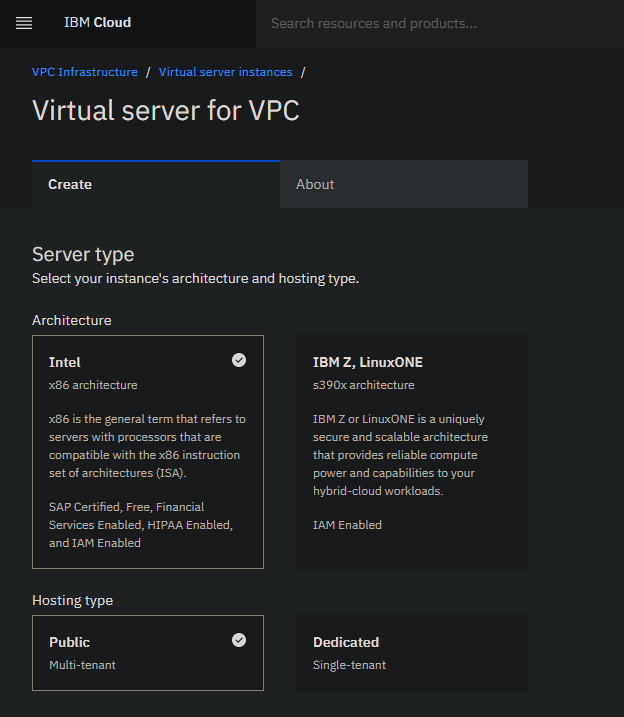
On the Virtual server for VPC page, specify the server.
-
In the Server type area, specify the type.
- For Architecture, select Intel.
- For Hosting type, select Public.
-
In the Location area, ensure that the Region and Zone settings match the region associated with the version you selected in step 4.
Note
IBM Cloud does not select a region automatically. Once you do so, IBM Cloud switches the operating system setting to the operating system of the Virtana Service Observability Collector image.
-
In the Details area, enter a name for your server.
-
Leave the settings in the Operating system area unchanged.
-
In the Profile area, select a bx2-4x16 instance or a larger instance.
Virtana Service Observability Collector requires a minimum of 4 CPUs, 16GB RAM, and a boot volume.
-
In the SSH keys area, select an existing key or create a new key.
The key you specify in this step becomes the default key for the ccuser account.
-
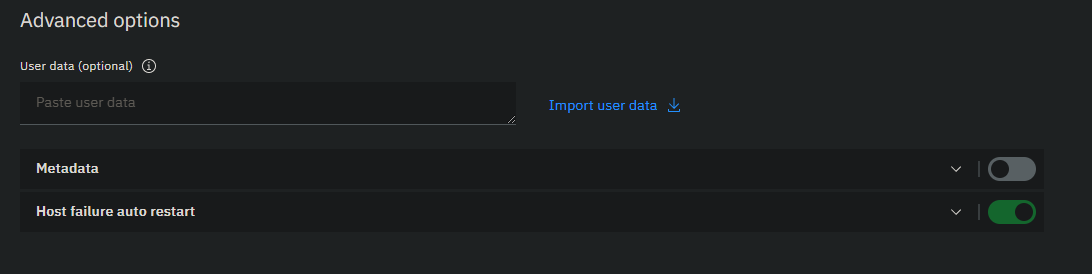
(Optional) In the Advanced options area, add DNS search domains or SSH keys.
-
Enable the Metadata option.
-
In the User data (optional) area, paste or import a JSON object that specifies the search domains or SSH keys.
For more information, see the user data example.
Note
IBM Cloud does not allow you to change user data after initialization. However, you can use the Virtana Collector Appliance TUI to change the settings after the virtual machine is running. See Optional DNS search domains or SSH keys for more information.
-
-
In the remaining areas, specify options as desired.
-
-
In the right column, click Create virtual server.
-
Gain access to the new virtual machine.
Use the SSH key pair generated during installation to log in to the
ccuseraccount:ssh ccuser@<PUBLIC_IP_ADDRESS> -i <PATH_TO_SSH_PRIVATE_KEY>
Classic Infrastructure
-
Log in to IBM Cloud as a user with permission to access the IBM Classic Infrastructure Public Images and create virtual machines in the VPC Infrastructure.
-
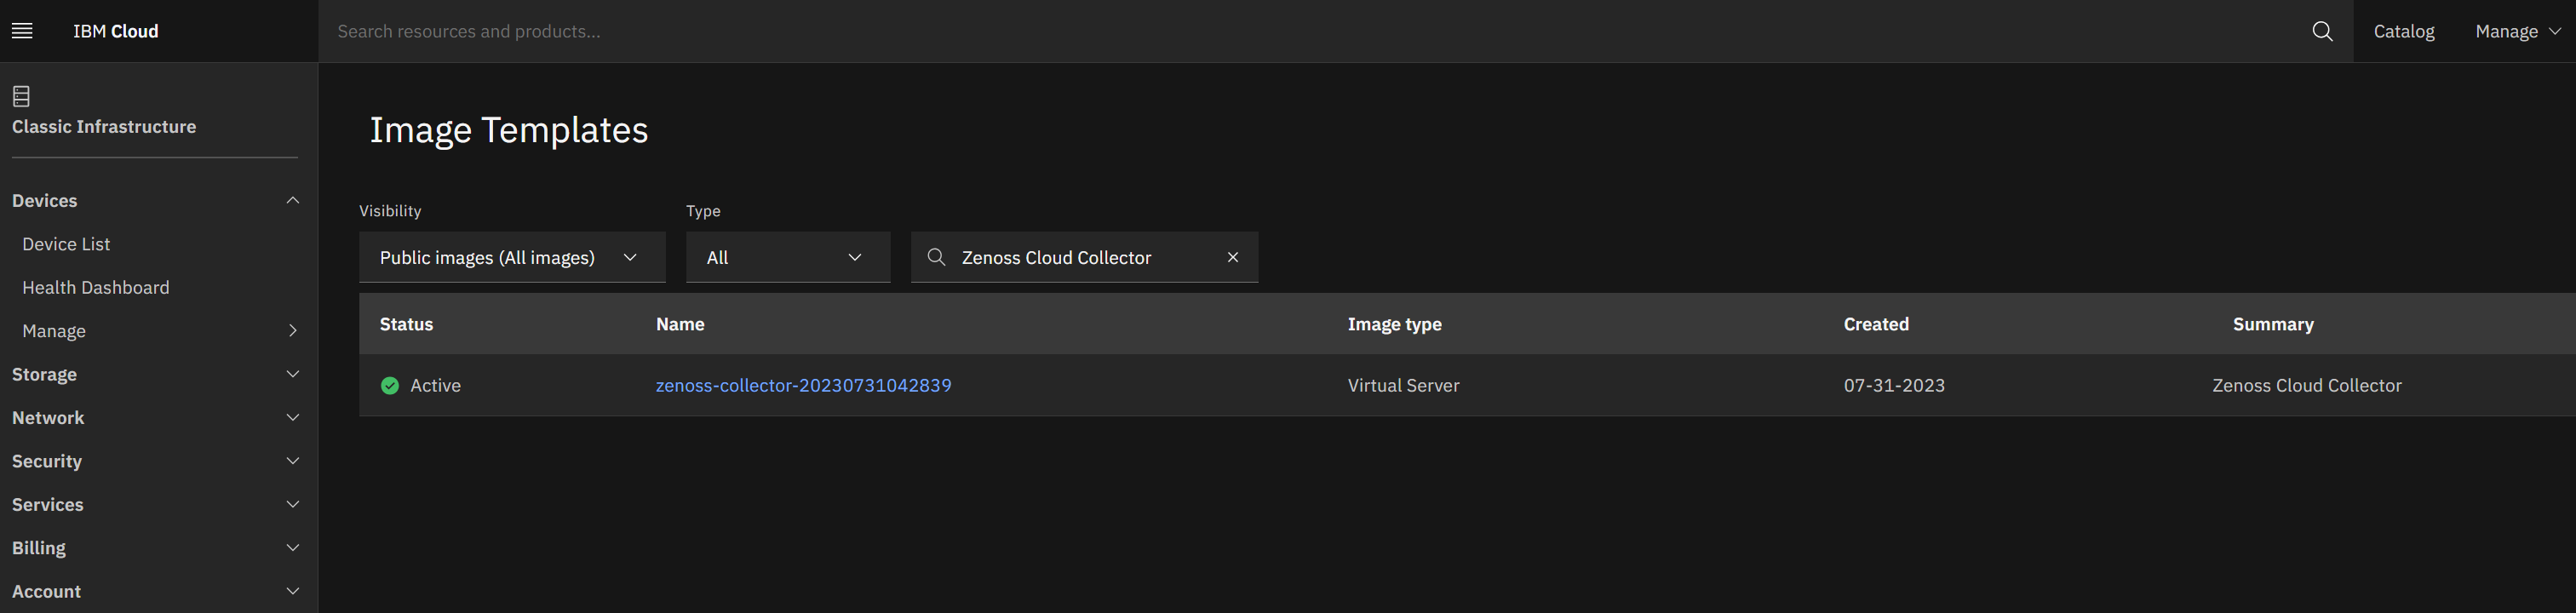
Navigate to the IBM Classic Images Page, select the "Public Images" dropdown, then search for "Virtana Service Observability Collector".
Note
There should only be one public image available for the Virtana Service Observability Collector. If there are more than one, please contact your Virtana representative for the proper image to use.
-
On the image, select the ellipses and select "Order" for the type of VSI required.
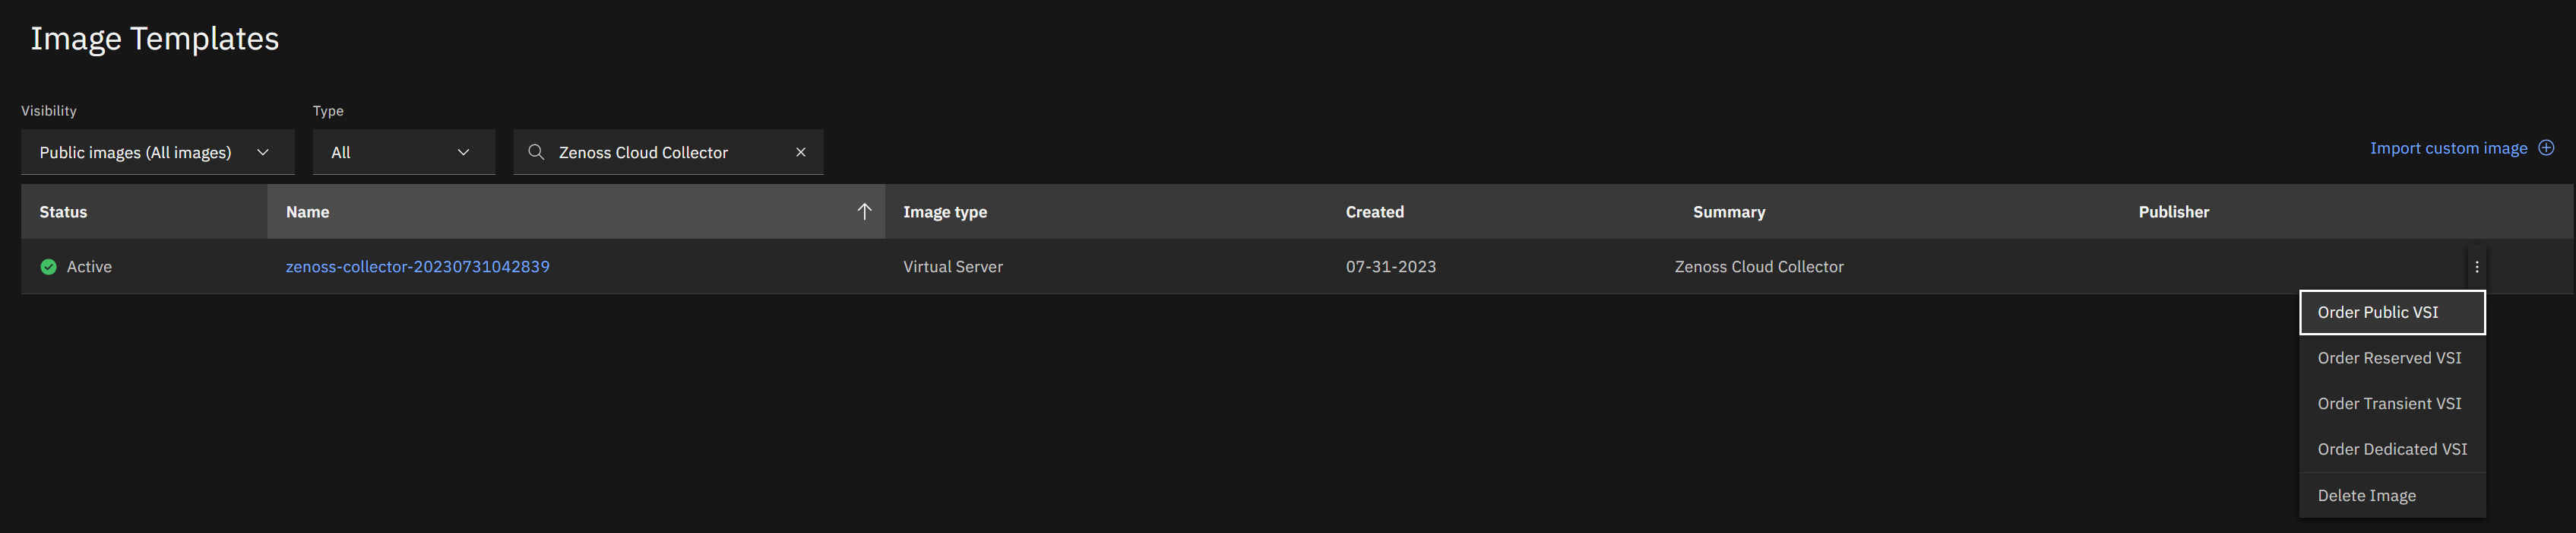
Note
We do not support the Transient VSI type as this is an ephemeral instance type.
-
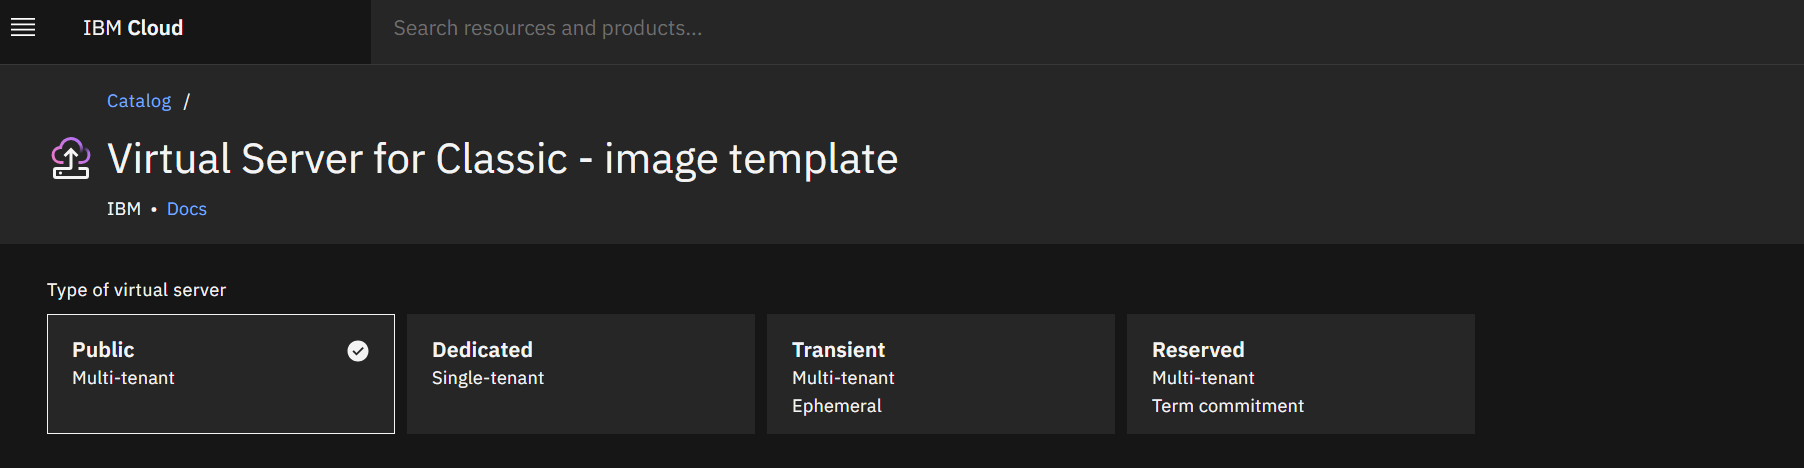
On the Virtual Server for Classic - image template page, specify the server.
-
In the Hostname and Domain area, enter a name and hostname for your server.
-
In the Location area, select the Region and Zone.
-
In the Profile area, select a B1.4x16 instance or a larger instance.
Virtana Service Observability Collector requires a minimum of 4 CPUs, 16GB RAM, and a boot volume.
-
In the SSH keys area, select an existing key or create a new key.
The key you specify in this step becomes the default key for the ccuser account.
Note
Forgetting to set this key will cause the appliance to be inaccessible.
-
Leave the settings in the Operating system area unchanged.
-
-
In the right column, check the Service Agreement checkbox then click Create.
-
Gain access to the new virtual machine.
Use the SSH key pair generated during installation to log in to the
ccuseraccount:ssh ccuser@<PUBLIC_IP_ADDRESS> -i <PATH_TO_SSH_PRIVATE_KEY>
Optional: Set additional DNS search domains or SSH keys
Note
Due to limitations with using userdata on Classic Infrastructure, userdata is only managed via the Administration Userdata menu.
You can customize DNS resolution for your virtual machine and grant access to additional users. The following options are supported:
- Additional DNS forwarding/DNS search domain entries
- A default resolver other than the one provided by IBM Cloud
- Additional SSH public keys
Example
For example, you wish to enable the following options for your virtual machine:
- Forward DNS queries for
*.example.comand*.example.orgto the203.0.113.4and203.0.113.5resolvers - Forward DNS queries for
*.myorg.example.netto the198.51.100.253resolver - Forward all other queries to the
192.0.2.2and192.0.2.3resolvers - Grant access to the private SSH keys associated with
public_key1andpublic_key2(through theccuseraccount)
To configure the options, create the following JSON object:
{
    "dns-forwarding": [
        {
            "dns-search": ["example.com", "example.org"],
            "dns-servers": ["203.0.113.4", "203.0.113.5"]
        },
        {
            "dns-search": ["myorg.example.net"],
            "dns-servers": ["198.51.100.253"]
        }
    ],
    "dns-default-servers": ["192.0.2.2", "192.0.2.3"],
    "sshkeys": [ "public_key1", "public_key2"]
}
Then, from the Virtana Collector Administration > Userdata menu, adjust the contents to match the new JSON object.
Next step
Connect to a Collection Zone (Initializing a collector appliance).