Virtana Service Observability agent on Linux
You can install and configure the Virtana Service Observability agent to collect data from your Linux hosts and stream it directly to Virtana Service Observability. You can use the non-interactive installation method so you can easily automate its distribution to hosts throughout your environment. The Virtana Service Observability agent can be installed on a real or virtual Linux host that uses Debian or the Red Hat package management system.
After installation, you can configure and manage the agent and collect metrics for your Linux hosts.
Installation process
During the non-interactive installation of the data monitor agent, the installer is supplied with a text file containing variables and parameter values that provide answers to the installer prompts, including the license agreement.
The non-interactive installation process includes the following tasks:
- Review hardware and software requirement as well as permissions.
- Download the Debian-based or Red Hat-based distribution file.
- Review and accept the license agreement Debian | Red Hat
- Select datasources Debian | Red Hat
- Set Virtana Service Observability API variables Debian | Red Hat
- Start installation Debian | Red Hat
Before you begin
Before you begin installing the Virtana Service Observability agent on a real or virtual Linux host, be sure that you meet the following requirements.
To install and manage the agent, you will need to meet the following hardware requirements:
- 1 CPU core (64-bit)
- 30 MiB main memory
- Approximately 100 MiB free space in
usr/binfor Virtana Service Observability agent software - A network interface that supports TCP/IP and provides a minimum of 5 Mbps (megabits per second) upload capacity
- Support for Advanced Encryption Standard (AES)
To install and manage the agent on a Linux host, you will need to meet the following software requirements:
- A Linux distribution that supports Debian or Red Hat distribution packages
- A login account with superuser privileges
- Internet access with outbound TCP traffic through port 443
- DNS support so you can reach your Virtana Service Observability API endpoint
To support Virtana tools, you will need to meet the following requirements:
-
Permission to download files at delivery.zenoss.io. You can contact the Virtana Support site to request this permission.
-
A Virtana Service Observability API authentication key.
-
The commands in the installation procedures use the Bash shell. Adjust as needed for other shells.
Download the distribution file
Perform the following steps to download the distribution file for the Virtana Service Observability agent.
-
In a web browser, go to delivery.zenoss.io and log in to the Virtana Support Portal.
-
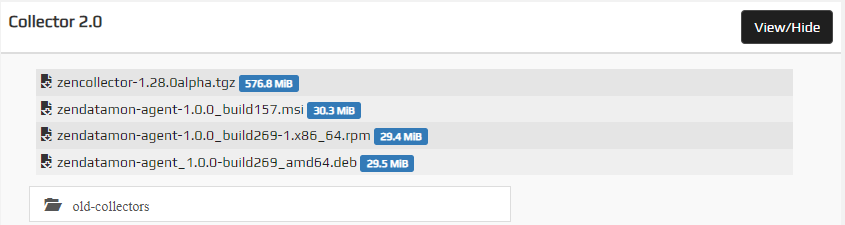
In Virtana Delivery, locate Collector 2.0 and click View/Hide to view the available files for download.
-
Download the latest file for the Debian-based or Red Hat-based systems. For example, download the
zendatamon-agent_1.0.0_build278.debfile or thezendatamon-agent_1.0.0_build278-1.x86_64.rpmfile. Note that the version number or build number might be different. -
If necessary, copy the file to the Virtana Service Observability agent host.
Install the Virtana Service Observability agent on Debian-based Linux hosts
Non-interactive installation
Perform the following steps to install (non-interactively) the Virtana Service Observability agent.
-
Log in to the Virtana Service Observability agent host and change directory to the directory where you saved the service distribution file.
-
Review and accept the license agreement for the Virtana Service Observability Agent Software. Example command:
echo "zdm-agent zendatamon-agent/zenoss_license_agreement boolean true" \ | sudo debconf-set-selections -
In this step, a default configuration file for the selected datasources is placed in the
/etc/zendatamon-configsdirectory. Optionally, you can add configuration files to this location later.Specify the list of datasources to enable. Replace
<YOUR-PLUGINS>with a space-separated list that includes at least one of the following datasource names. The host-linux-device is the recommended minimum datasource.- host-cpu
- host-disk
- host-filesystem
- host-linux-device
- host-linux-lvm
- host-linux-service
- host-network-interface
- host-process
- http
- icmp
Example command:
echo "zdm-agent zendatamon-agent/zenoss_datasources multiselect <YOUR-PLUGINS>" \ | sudo debconf-set-selections -
Specify a Virtana Service Observability API authentication key. Replace
<YOUR-API-KEY>with a valid authentication key for your environment. Example command:echo "zdm-agent zendatamon-agent/zenoss_api_key string <YOUR-API-KEY>" \ | sudo debconf-set-selections -
Specify your Virtana Service Observability API endpoint. Replace
<YOUR-API-ENDPOINT>with the endpoint for your environment. Example command:echo "zdm-agent zendatamon-agent/zenoss_api_endpoint string <YOUR-API-ENDPOINT>:443" \ | sudo debconf-set-selections -
Start the installation and monitor the service startup. Example command:
NEEDRESTART_SUSPEND=Y; DEBIAN_FRONTEND=noninteractive; \
  sudo apt install ./zendatamon-agent*.deb \
  && sudo journalctl -f -u zendatamon-agent
The installation scripts enable and start the agent. For more information about managing the service, see Managing Virtana Service Observability agent on Linux.
Install the Virtana Service Observability agent on Red Hat-based Linux hosts
Non-interactive installation
Perform the following steps to install (non-interactively) the Virtana Service Observability agent.
-
Log in to the Virtana Service Observability agent host and change directory to the directory where you saved the service distribution file.
-
Review and accept the license agreement for the Virtana Service Observability Agent Software. Example command:
export ZENOSS_LICENSE_AGREEMENT="Y" -
In this step, a default configuration file for the selected datasources is placed in the
/etc/zendatamon-configsdirectory. Optionally, you can add configuration files to this location later.Specify the list of datasources to enable. Replace
<YOUR-PLUGINS>with a space-separated list of at least one of the following datasource names. The host-linux-device is the recommended minimum datasource.- host-cpu
- host-disk
- host-filesystem
- host-linux-device
- host-linux-lvm
- host-linux-service
- host-network-interface
- host-process
- http
- icmp
Example command:
export ZENOSS_DATASOURCES="<YOUR-PLUGINS>" -
Specify your Virtana Service Observability API authentication key. Replace
<YOUR-API-KEY>with a valid authentication key for your environment. Example command:export ZENOSS_API_KEY="<YOUR-API-KEY>" -
Specify your Virtana Service Observability API endpoint. Replace
<YOUR-API-ENDPOINT>with the endpoint for your environment. Example command:export ZENOSS_API_ENDPOINT="<YOUR-API-ENDPOINT>:443" -
Start the installation and monitor the service startup. Example command:
yum install -y ./zendatamon-agent*.rpm && journalctl -f -u zendatamon-agentThe installation scripts enable and start the Virtana Service Observability agent. For more information about managing the service, see Managing the Virtana Service Observability agent on Linux.
Managing the Virtana Service Observability agent on Linux
You can manage the service with standard systemd utilities. To manage the datasources, edit their configuration files.
Manage the Virtana Service Observability agent service
Use the systemctl utility to start, stop, and manage the zendatamon-agent service.
For example, to stop the service, enter the following command:
systemctl stop zendatamon-agent
To review the log file, use the journalctl command:
journalctl -f -u zendatamon-agent
Most of the user configuration properties in the configuration file for the Virtana Service Observability agent service
are set when you install the service. The service configuration file is /etc/zendatamon-configs/agent.yaml. The agent service loads configuration file changes immediately.
In the following example file, the defaultInterval field sets the collection interval to 30 seconds.
apiVersion: v1
agent:
  name: zencollector
  source: host.example.com
  defaultInterval: 30s
configurationSource:
  local:
    - name: "default local config"
      directory: "/etc/zendatamon-configs/configs"
datasinks:
  - name: api.zenoss.io
    type: zenoss
    conf:
      address: api.zenoss.eu:443
      apiKey: <YOUR_API_KEY>
secretlookup:
  type: noop
Datasources
You can configure datasources in the host-linux-device datasource configuration file, if enabled. The Virtana Service Observability agent service loads configuration file changes immediately.
Datasources include:
- host-cpu
- host-disk
- host-filesystem
- host-linux-device
- host-linux-lvm
- host-linux-service
- host-network-interface
- host-process
The http configuration file and the icmp configuration file are independent of the host-linux-device configuration file.